
Hi! I’m Matt Park, a Creative Developer based in New York.
In this article, we’ll be exploring one of the easiest yet coolest effects you can create in Three.js—the Transmission Material.
To be precise, native Three.js doesn’t have a material called TransmissionMaterial, but Drei does. Drei is a library packed with helper components designed to enhance the development of React Three Fiber applications.
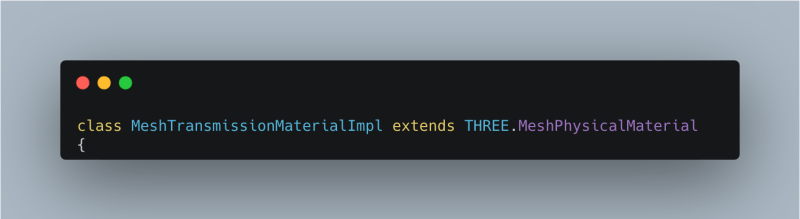
Although MeshTransmissionMaterial comes from Drei, it’s not an entirely new material. Drei layers a bunch of shaders on top of Three.js’ MeshPhysicalMaterial to create refraction effects.
Setup
The original idea behind the model used in this article comes from a trend in the Blender community where circular text is placed inside a glass-like material.
Upon seeing this Blender tutorial, I immediately knew it was the perfect model to experiment with MeshTransmissionMaterial, so I quickly modeled it in Blender.
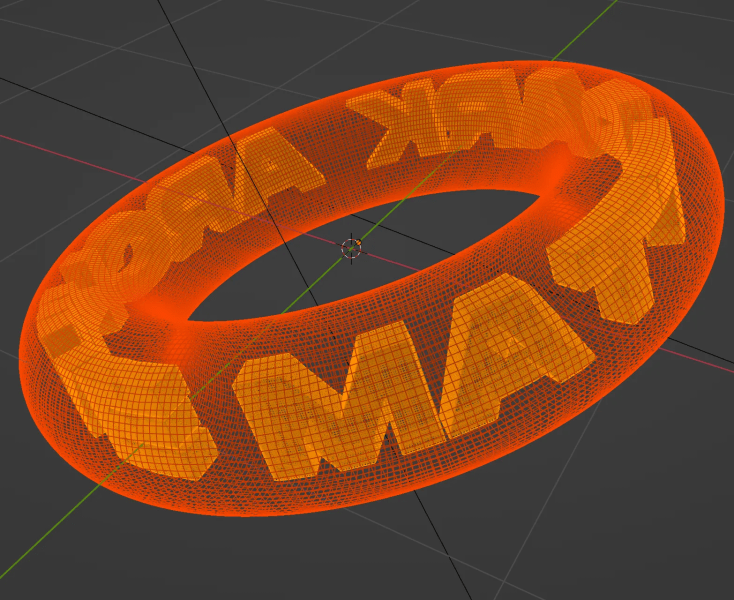
For those following along with this article, keep in mind that using this specific model isn’t necessary at all. The fundamentals of how Transmission Material works remain the same for all models, even for a simple boxGeometry 🙂
First Steps
Once you load your model into your Three.js scene with MeshTransmissionMaterial, you might be surprised to see a very dull-looking material.

Then we go back to the original
MeshPhysicalMaterialdocs, only to find the instructions below.

This is because the key to transmission materials lies in how light is reflected through the material. That’s the essence of any transparent material in real life as well. Think of it this way: if a material were transparent without any reflections or light bending across its surface, it would look as dull as the torus above. The beauty of any transparent material comes from the way light bends and refracts through its surface. Adding environment settings to our Three.js scene helps achieve this effect by simulating real-life lighting, providing enough light for the material to reflect properly.

Diving into Transmission Materials
Using MeshTransmissionMaterial is straightforward. However, truly understanding its detailed properties takes time and requires a deeper grasp of how transmission materials work. In this section, we’ll break down each field step by step and explore how they contribute to the material’s behavior.
Samples
The samples property controls the number of refraction samples used to simulate light transmission. Higher values result in smoother, more realistic refraction, while lower values can create rougher refractions, sometimes leading to grainy artifacts. The default value is 10, but you can adjust it to find the best balance for your desired effect.
Note that higher sampling means greater computational cost, leading to a negative performance impact. This happens because increasing the number of shader traces significantly raises the computational workload required to approximate the refraction effect.
Resolution
The resolution field controls the render texture resolution used for refraction. If using multiple transmission materials in your scene causes performance issues, you might want to adjust the resolution. Personally, I think this is one of the most underrated fields. Lowering the resolution to around 128–256 can create a pixelated effect—without even needing a custom shader.
Transmission
The transmission field controls how much light passes through the material. It takes a float value between 0.0 and 1.0, where 0 represents a fully solid material, and 1 makes it completely transparent. As you might expect, setting a value between 0 and 1 creates a semi-transparent effect, allowing some light to pass through.

Roughness
As some of you might have already noticed, MeshTransmissionMaterial extends THREE.MeshPhysicalMaterial, meaning we also have access to all the fields from MeshPhysicalMaterial. I wasn’t planning to cover this field, since most of you are probably already familiar with how roughness works in materials. However, I wanted to highlight one interesting detail—when roughness is set to 1.0, the material becomes completely invisible.

This happens because when roughness is set to 1.0, the surface becomes so rough that it scatters light completely. As a result, light can no longer pass through, eliminating reflections while the material absorbs and diffuses all incoming light.
Color
The cool thing about the color field is that it acts as an additional filter layer over your material, affecting everything inside or behind the transmission material. Notice how the original letters inside my torus were either orange or light purple—setting the color of MeshTransmissionMaterial creates the effect of looking through tinted glass.

Diving Deeper into Transmission Material
Now, let’s dive into more advanced concepts in TransmissionMaterial. Keep in mind that these fields influence one another, and each unique combination will produce a different visual effect.
IOR
IOR stands for Index of Refraction. Simply put, it controls how much light bends (refracts) when passing through a material. Think of it like adjusting the thickness of glass—although it’s a completely different concept. A material with a lower IOR value results in less refraction, while a higher IOR value increases distortion and depth, similar to glass or diamonds.
For reference, here are some common IOR values:
Air: 1.0003
Water: 1.333
Diamond: 2.42
These values give us an idea of how refraction behaves at different levels.
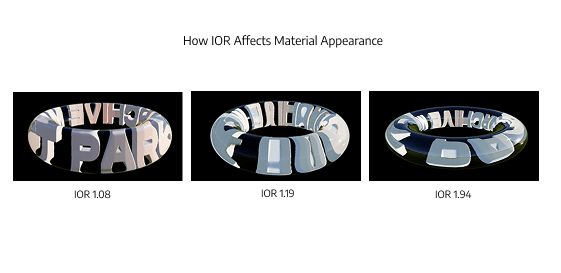
One interesting characteristic of IOR is that objects with high values appear warped. As IOR increases, light bends more, creating strong distortions and a magnified, warped effect.
Below is an example of how the material looks as the IOR value increases:
Thickness
Along with IOR, another field that contributes to the warping effect is thickness. This field controls how deep light travels through the material before exiting. Keep in mind that the fields discussed in this section influence one another.
If IOR is set to 1.0, you’ll notice that changing the thickness has no effect on the material’s appearance. This happens because thickness only matters when light bends inside the material. If there’s no refraction happening in the first place, thickness won’t have any visual impact.
Chromatic Aberration
The chromaticAberration field simulates color dispersion, where different wavelengths of light bend at slightly different angles. Think of how diamonds and prisms split light into a subtle rainbow effect.
This Wikipedia example gives a good visual reference for chromatic aberration.
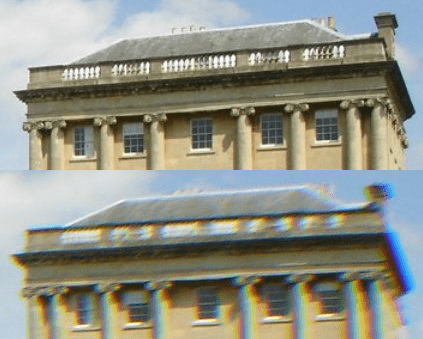
This field ranges from 0.0 to 1.0. Lower values result in little to no dispersion, similar to real-life glass. As the value approaches 1.0, color splitting becomes more pronounced, creating stronger chromatic aberration and exaggerated rainbow edges in the refraction.

Anisotropy
The anisotropy field, also known as directional blur, controls how light is stretched—often creating a streaked glass or frosted glass effect. By default, anisotropy is set to 0, meaning light is reflected evenly in all directions.
An interesting aspect of this field is how it interacts with roughness. Higher roughness values cause anisotropic reflections to become more diffused and spread out, altering the final appearance of the material.

Notice how we can achieve a frosted glass effect by combining the anisotropy and roughness fields.
Distortion, Distortion Scale, and Temporal Distortion
These three properties—distortion, distortionScale, and temporalDistortion—control how light waves bend and shift as they pass through the material. When used effectively, they can simulate effects like wavy glass, heat distortion, water, or even a jelly-like appearance. Let’s break them down one by one.
The distortion field is the primary control for warping light, creating a wavy effect. Higher values increase the amount of bending and distortion.
distortionScale adjusts the size and frequency of the distortion waves—higher values result in larger, more stretched distortions.
Finally, the temporalDistortion field animates the distortion effect. A well-balanced combination of these values can create a stunning refraction effect, similar to water, without even needing to use useFrame or requestAnimationFrame!
Animations?
Once you’ve followed along with this article, you’ll start to see that creating fancy animations just by tweaking different fields isn’t difficult at all. While experimenting with different properties using Leva, I found it incredibly satisfying to watch how IOR changes in real time—to actually see the “woosh” effect with our own eyes.
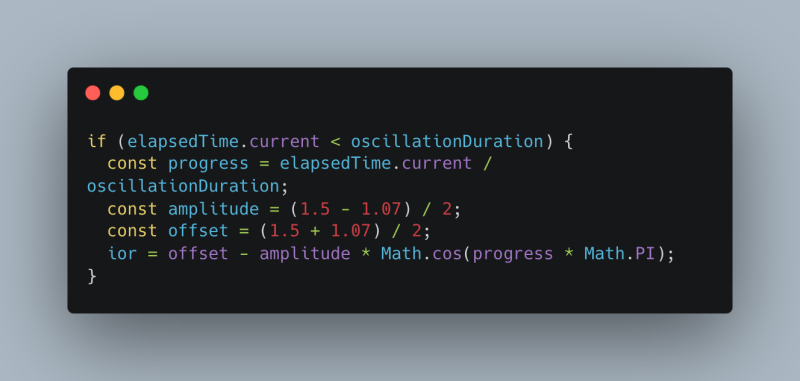
To animate this effect, I set up two different phases: the pause phase and the oscillation phase, where the “wooshing” happens. The IOR values I wanted to use ranged from a minimum of 1.07 to a maximum of 1.5. Using some basic math, I implemented this inside my useFrame function.
By using GSAP to animate IOR over time, I achieved this result:
After I posted this on X, I received a lot of inquiries about how I managed to position the text perfectly inside my torus. The secret sauce? IOR 😉
Performance
Performance for MeshTransmissionMaterial is not cheap at all, so we need to be mindful of how we use it. When an object has transmission enabled, Three.js performs a separate render pass of the scene for each object using this material. This is necessary to correctly compute the refracted background for every transmission object.
Unlike simple opacity—where transparency is handled in a single pass—transmission materials require an additional pass to determine the refraction effect. If multiple objects in a scene use transmission, Three.js must re-render the entire scene multiple times—once for each object. This can quickly become a performance bottleneck, significantly increasing the number of draw calls.
Going Further
Mastering MeshTransmissionMaterial can lead to some truly fascinating results, like this:
I’ve seen several Three.js scenes where developers use complex shaders to achieve similar effects. However, once you understand the magic behind Transmission Material, you’ll start recognizing all the creative possibilities it offers! 🙂
And that’s it! Huge thanks to Codrops for giving me this opportunity to contribute to the Three.js community. If you have any questions, feel free to reach out to me on X.
Remember, all great art comes from silly experiments. Cheers to the Three.js community! 🎮🌟