
Nice to meet you! I’m Michael, a visual designer based in Stockholm. I grew up in the Midwest in the US and worked in advertising before switching to interactive projects. In my free time, I practice new skills in AfterEffects and Blender to create prototypes.
This was one of my recent animations when I tried out some gem materials in Blender.
My Program Stack
I normally use these programs and plugins when creating prototype animations:
- Blender – For 3D motion and visuals
- Figma – For layout and UI
- AfterEffects – For the motion and stitching in the 3D animation
- AEUX – A handy plugin to convert Figma to an AE file
- Motion 4 from Mt. MoGraph – A ton of helpful scripts to speed up the animation process
- Flow – A plugin to make editing easing curves a lot simpler
Concept and Explorations
I began with the idea of using gems as the main visual. Since I knew I wanted to play with gemstone material, I started in Blender to create some assets that I could use when playing around with layouts in Figma. Something about the gemstones felt like little rewards for achievements and I liked the concept of earning gems for completing basic adult tasks.
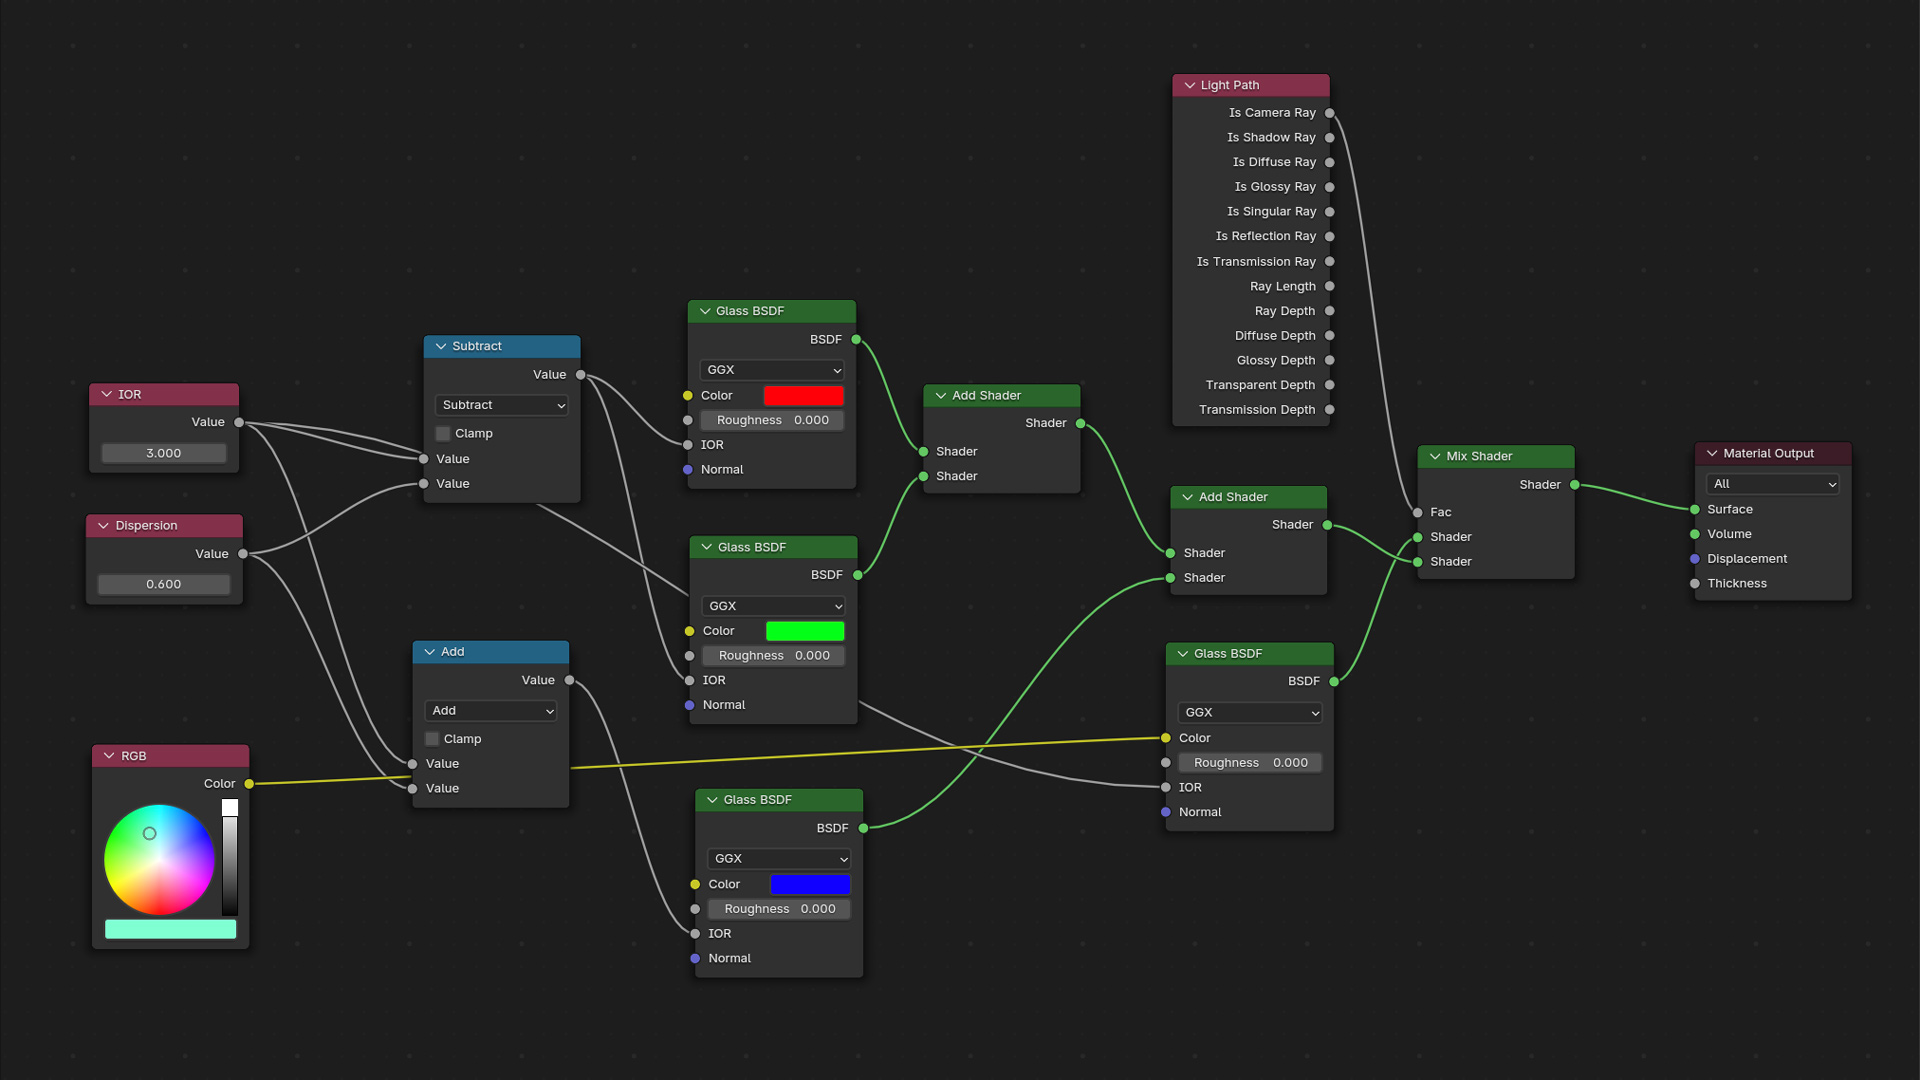
Glass and gems are always a complex shader node tree that I never can remember how to set up so I used this tutorial from blenderbitesize to build the base material for the gems.
Here’s the final shader setup in case you’re curious. Most of the glass tutorials I’ve followed have this same output in the end where the refractions are broken out in Red, Blue, and Green. Blender’s standard Glass BDSF works okay, but to get the chromatic aberration that is seen in gems and prisms, an extra layer of nodes is needed to break up the light.
The nice part about this specific setup is that you can look up the IOR and dispersion qualities for actual gemstones and use the real values to get an extra layer of reality to the scene.
Animation Process
I always use Blender and AfterEffects which can be tricky to sync together. If you’re using Cinema4D, the process might be a bit simpler since there’s some integration built into AfterEffects with Cinema4D, but Blender is free, so it’s always my go-to.
Each project might have a slightly different workflow depending on the animation. Specifically, scroll animations like this one are the hardest since you are trying to sync easing curves between two programs. It can get even trickier if the UI affects the 3D by refracting the background or having the cursor interact with 3D (like in this Dribbble post). For this gemstone post, I knew I wanted some big scroll movements that would take up some time, and skipped over the background refraction to simplify.
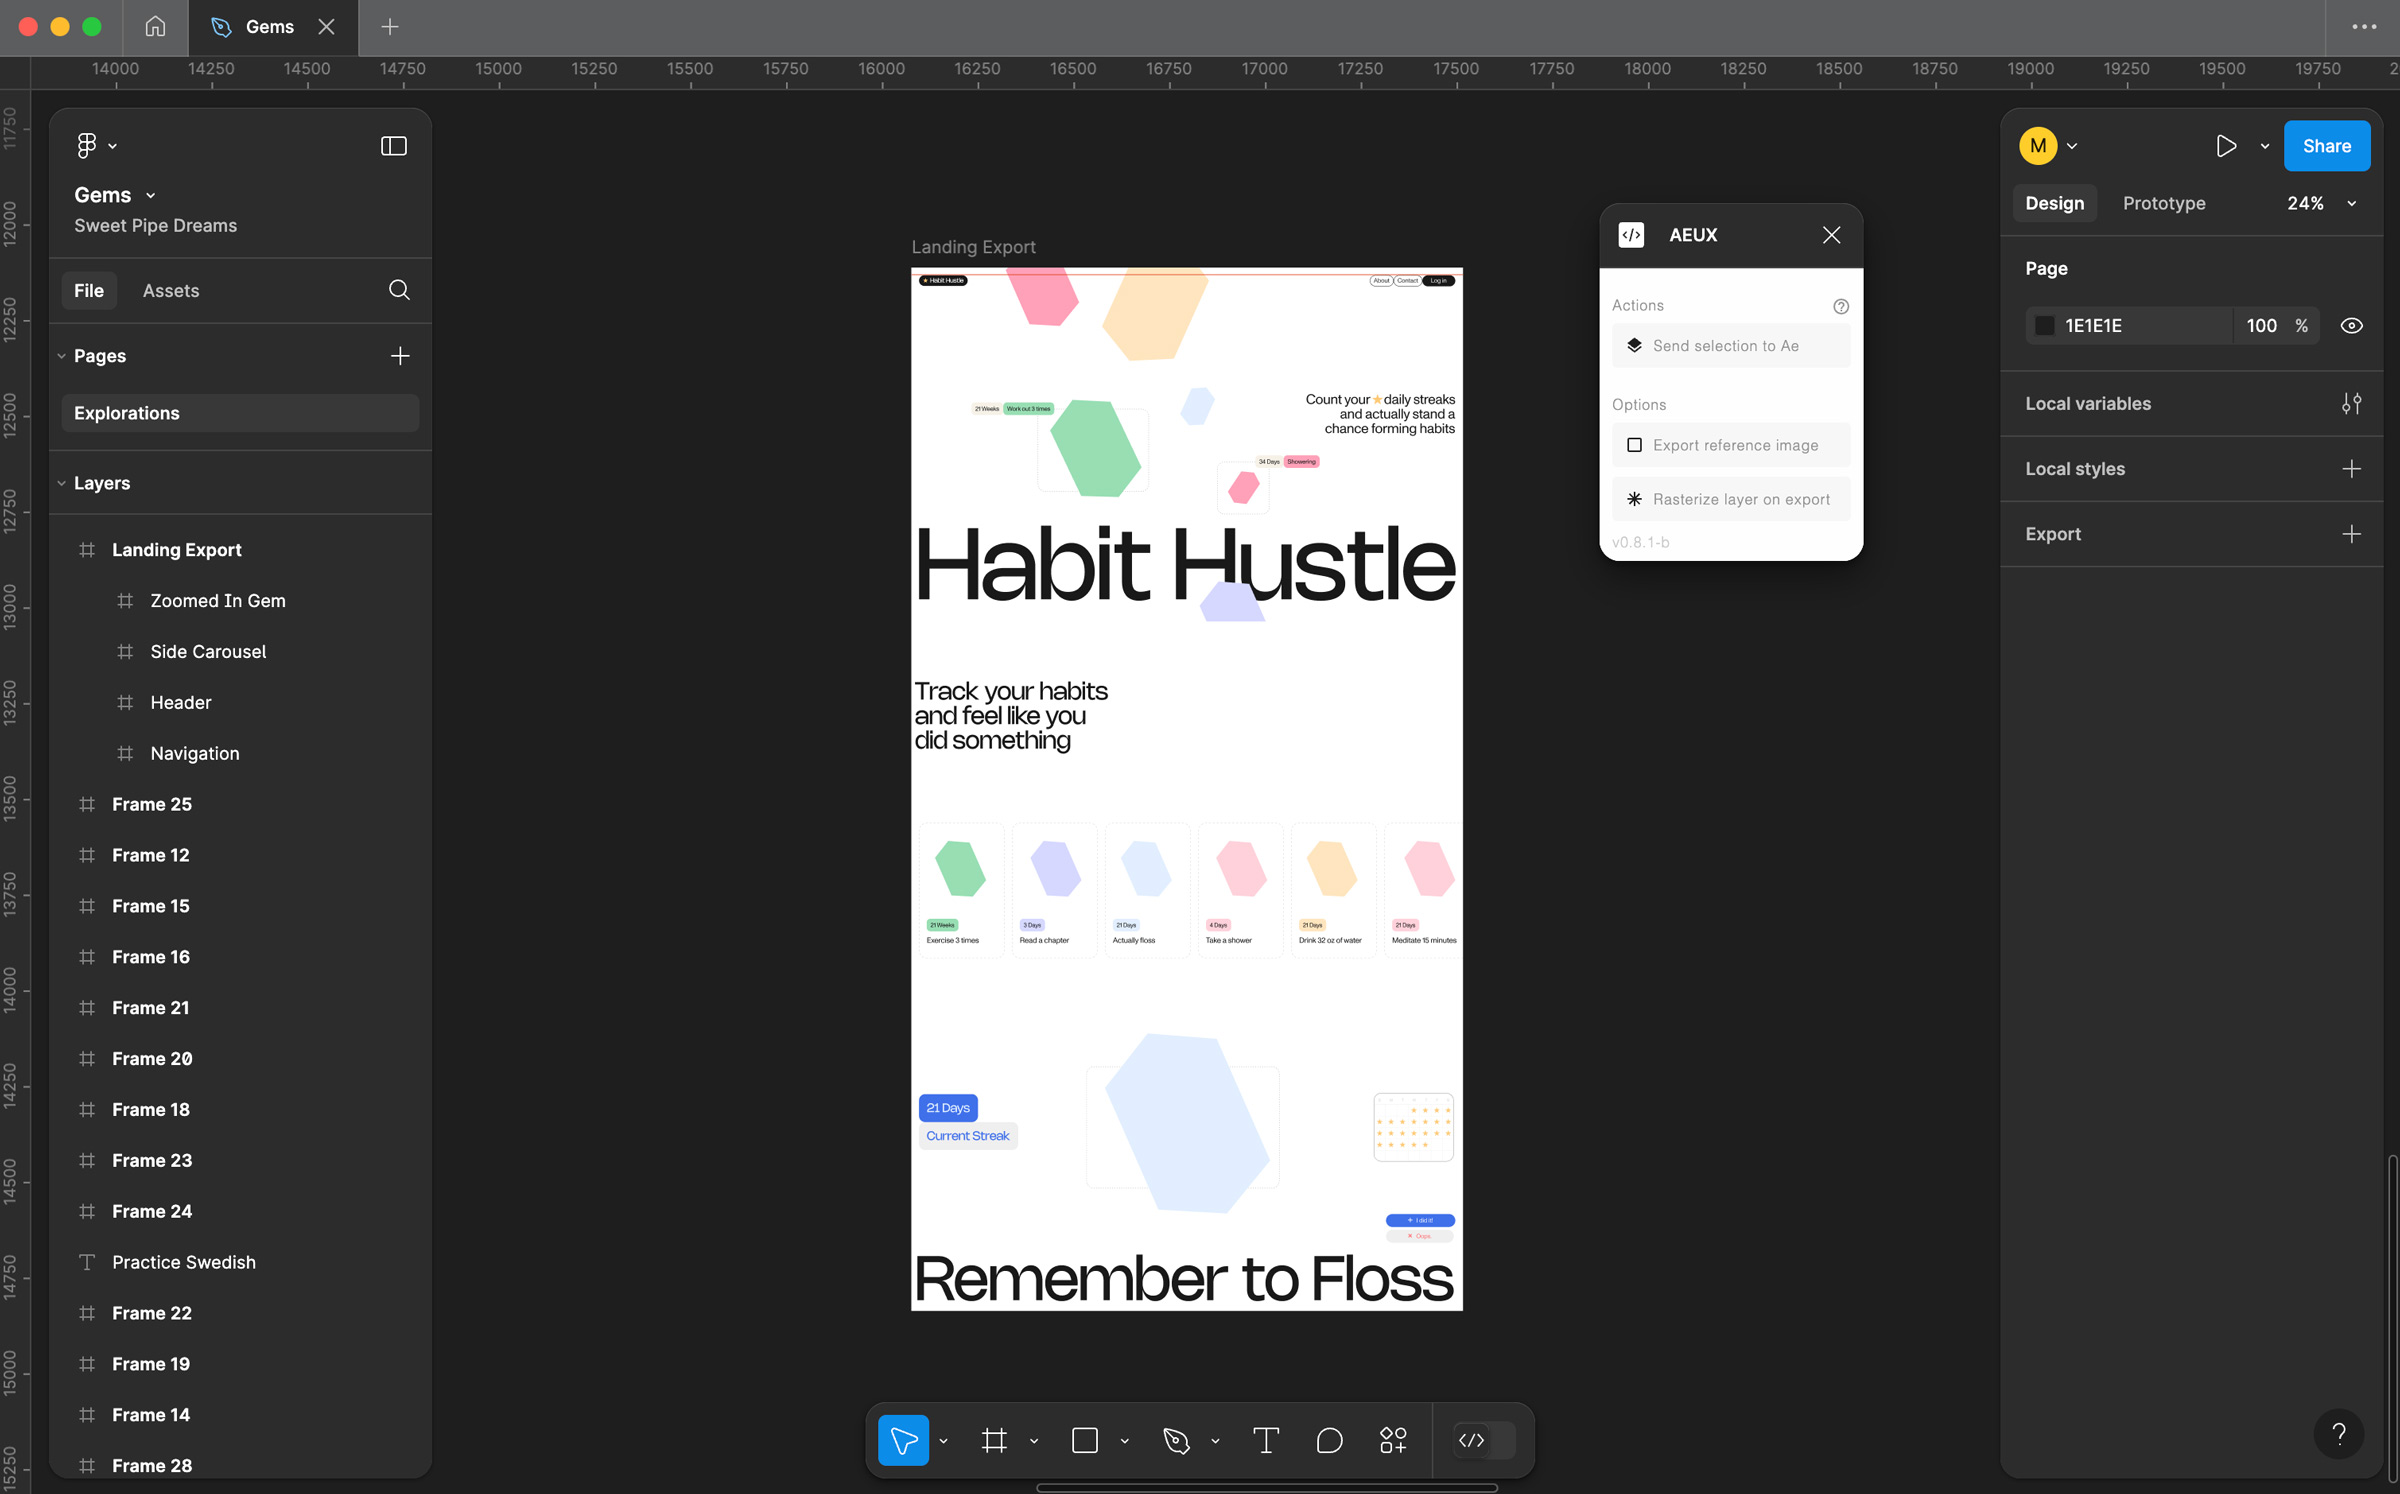
1. Export Layout from Figma to AfterEffects
Figma and Adobe programs don’t work the best together, but AEUX is a handy plugin to simplify the process a bit. The downside is that it can be a bit glitchy and takes a fair amount of cleanup in both Figma before exporting and in AfterEffects before starting. While it’s not perfect, it saves quite a bit of time.
A few tricks I’ve learned through trial and error:
- Frame any unused elements together – Having as few layers as possible to work with in AfterEffects makes the animations more manageable to create.
- Type is always messy – Not a great solution for this problem. The leading almost is always messed up and the type is usually placed about 5-10px higher than you want. Besides just manually adjusting, you can have AEUX rasterize the type layers if you’re not animating them by adding a little asterisk (*) in front of the layer name.
- Background Colors on the page don’t automatically come over – Either create a new shape in AfterEffects for the background or create a rectangle in Figma as the background.
- Vector shapes are a bit unpredictable – The best way to avoid weird vector shapes is to outline the Flatten Selection (Cmd + E) in Figma before exporting. Some shapes you don’t want to do this with (usually circles and rectangles) because there are a lot of handy AfterEffects features with basic shapes, but complex shapes need to be flattened.
- Name your layers in Figma – I usually do this… Unless I’m feeling lazy. It always saves me time later on in AfterEffects so I don’t need to hunt for layers. It also is a good opportunity to clean up the file.
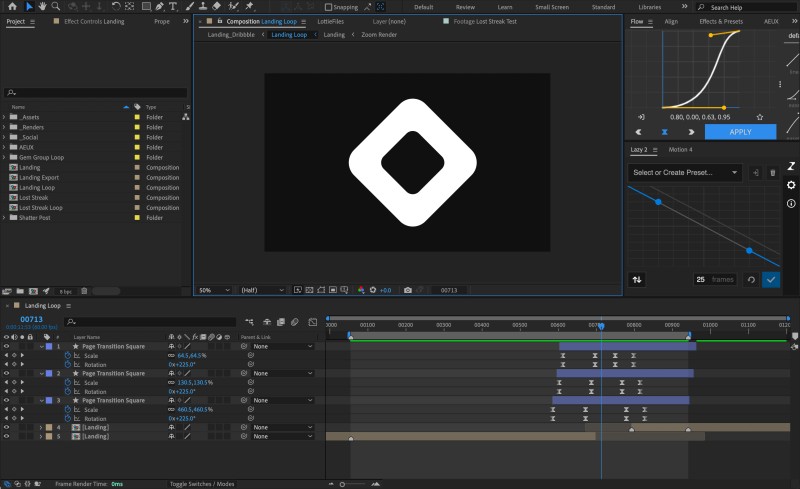
2. Build Animation in AfterEffects
This is important to do first to get the timings down. The render time for Cycles in Blender is quite long and even longer when a Glass shader is involved, so figuring out the timing of the whole animation first helps. If you can at least get the main idea first in AfterEffects, it will save a headache later on.
Using a few great plugins can help too. These are my two go-to ones:

- Motion 4 from Mt MoGraph – There are a lot of useful features in here for menial AE tasks and a lot more that I should use, but always forget.
- Anchor Point Adjustments – Quickly change where the anchor points are on a shape
- Text-Break – Break apart text into shape layers either as letters, words, or lines
- Stagger – Space out layers in the timeline to create stagger effects (like I have on the “Habit Hustle” title)

- Flow – I use this plugin to animate easing values instead of the graph editor. It makes the curves so much easier to visualize and edit than just using the graph editor to check the curves after.
- Copy/Paste Easing Values – The great part is that you can select any two tweens on the timeline and copy the easing value to any other keyframes. It helps a ton to keep all your easings feeling connected.
- Translate Easing Values to Code – The numbers underneath the graph editor (e.g. 0.48, 0.05, 0.20, 1.00) are also perfect to hand to a developer and can be used in most animation frameworks as well.
3. Export Rough Animation from AfterEffects into Blender
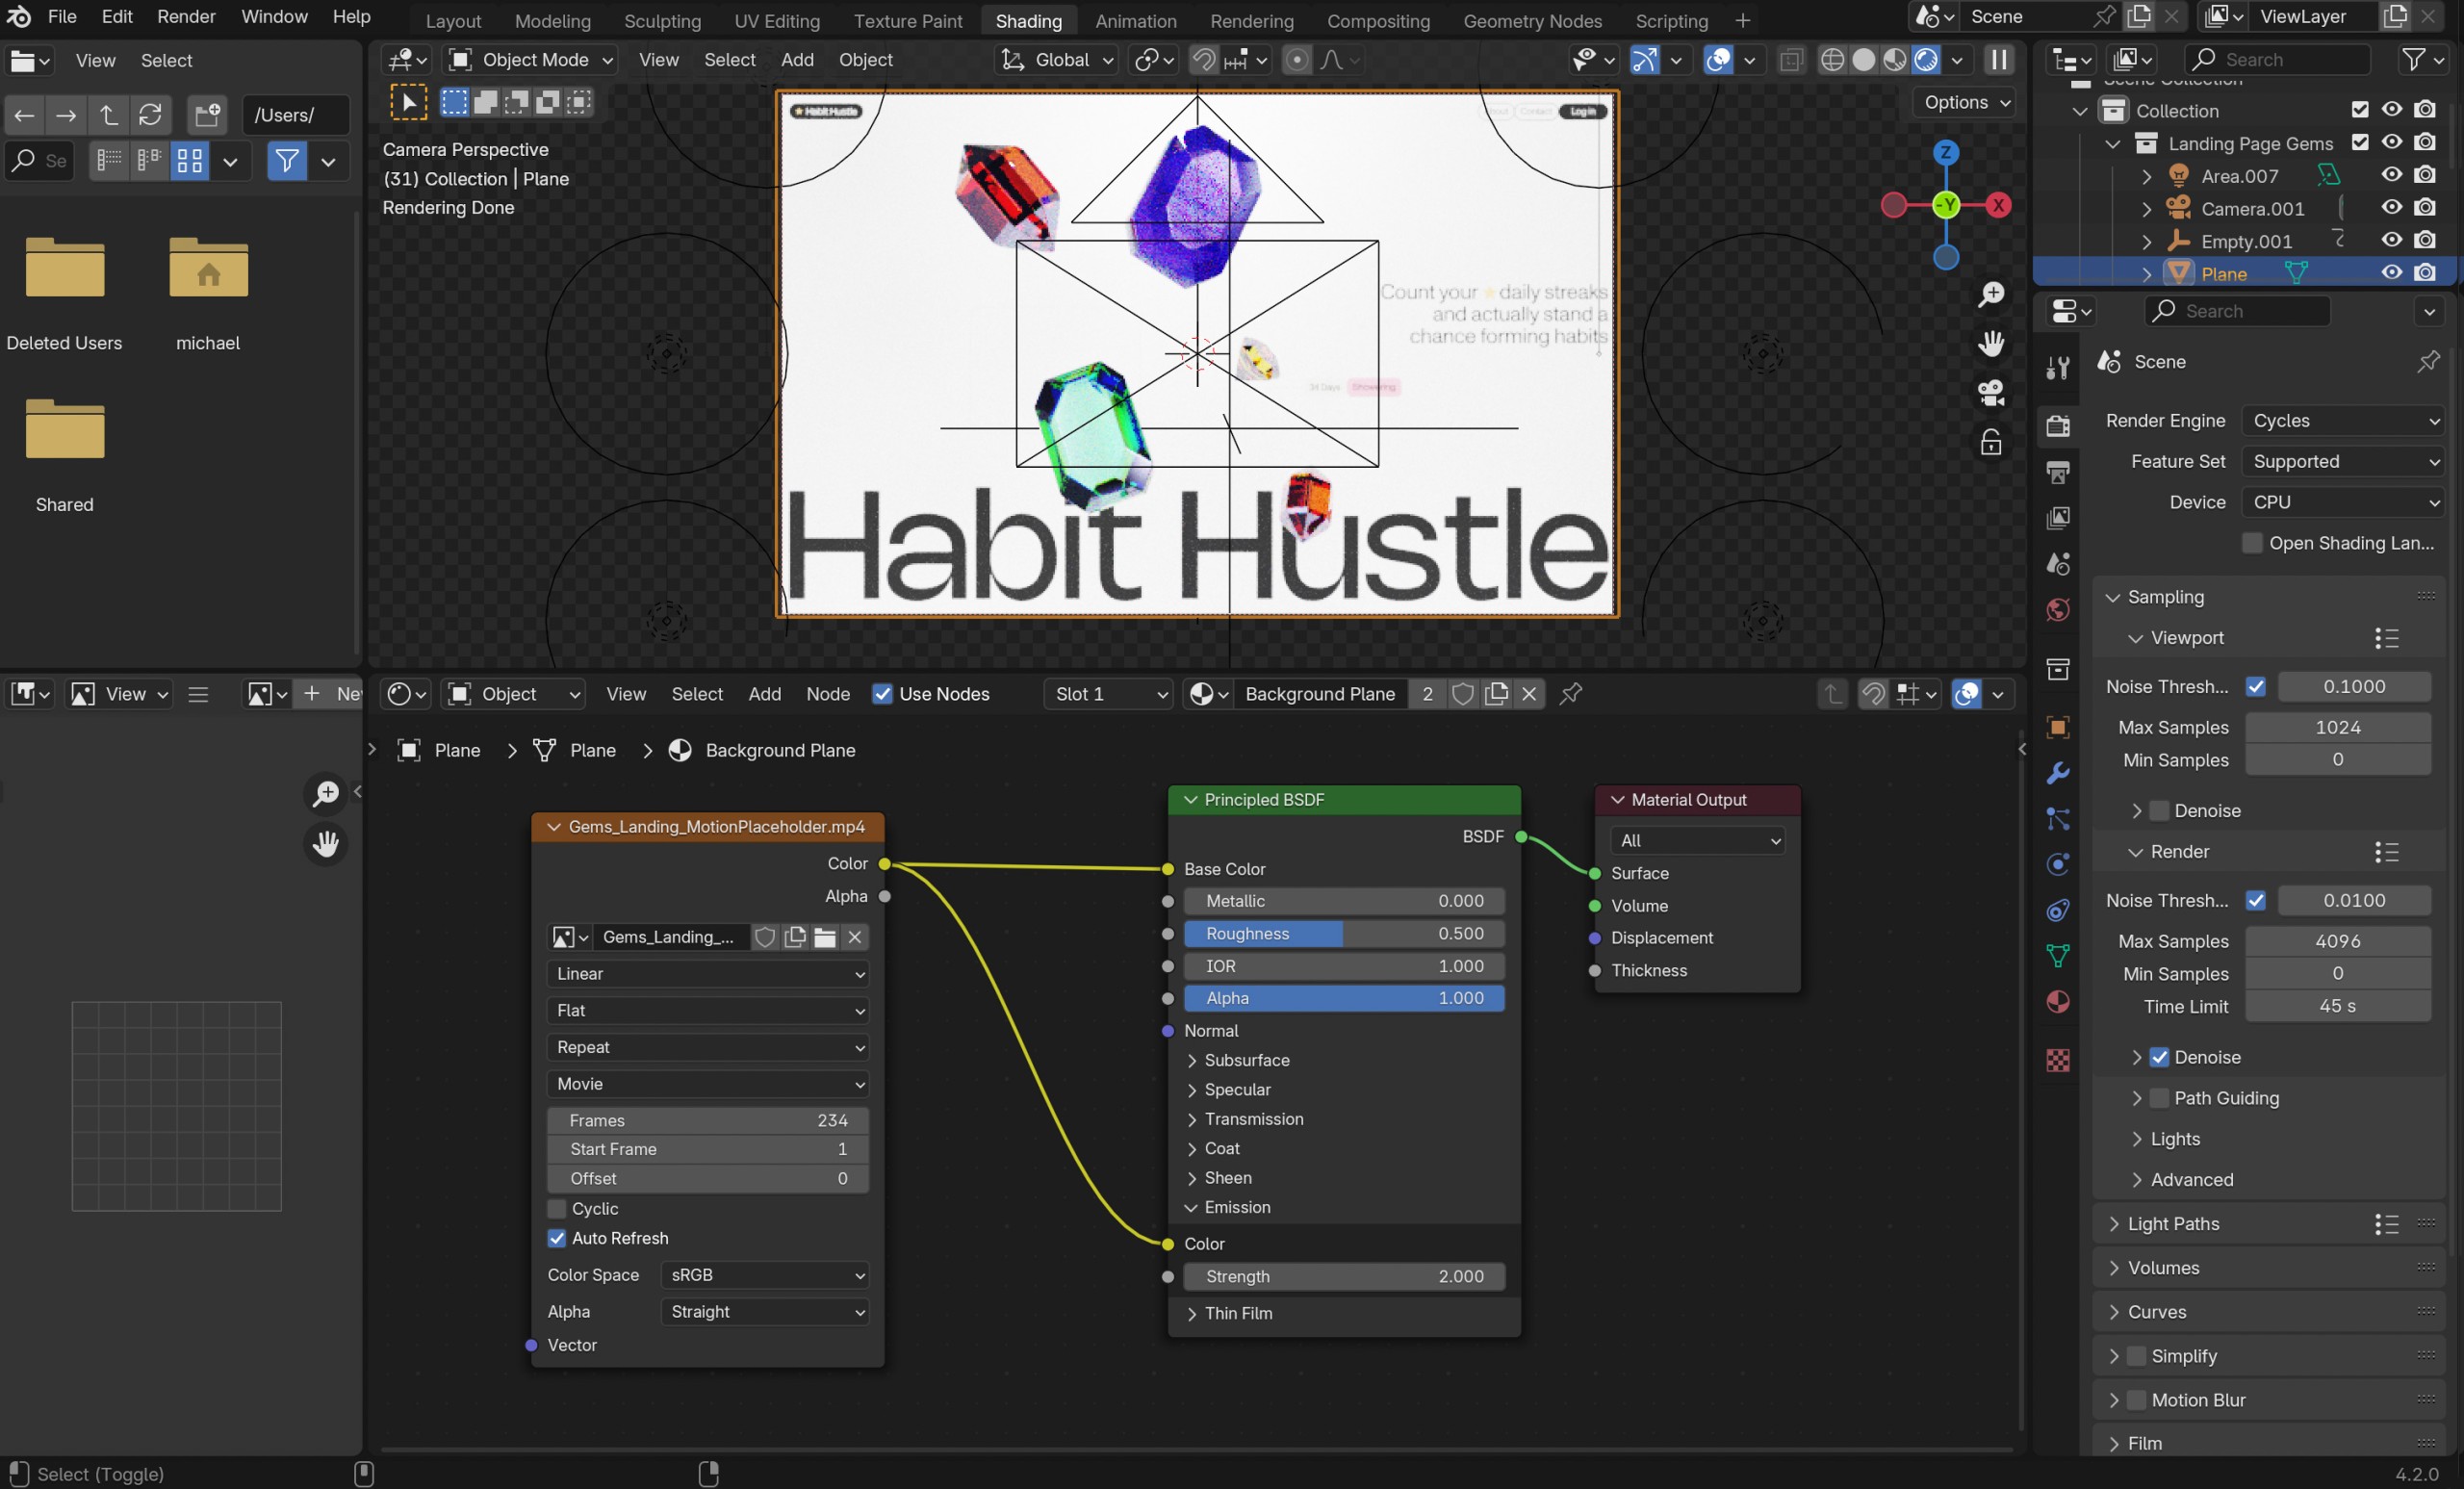
I put the exported video from AfterEffects as a texture on a plane in Blender with the same ratio as my AfterEffects comp, then use this as a reference for timings in the animation. Make sure to click Auto-Refresh on the image texture node so it updates on every frame and puts in the correct number of frames Blender should play from the animation. Also, it’s important to stay in Cycles to see the video.
This just gives me a rough idea of how the animation will work. Normally, the animation I export is a lot rougher than this. All I need to know is the timings of the scroll and when I should make any big moves in Blender.
4. Build the Animation in Blender
The animation workflow in Blender is something I’m still trying to improve on. The best part about Blender is that nearly any property can be animated – everything from shader values to the position of elements. The worst part is that it’s difficult to get a high-level overview of your animation and see all of the pieces working together.
It’s pretty easy to get started though.
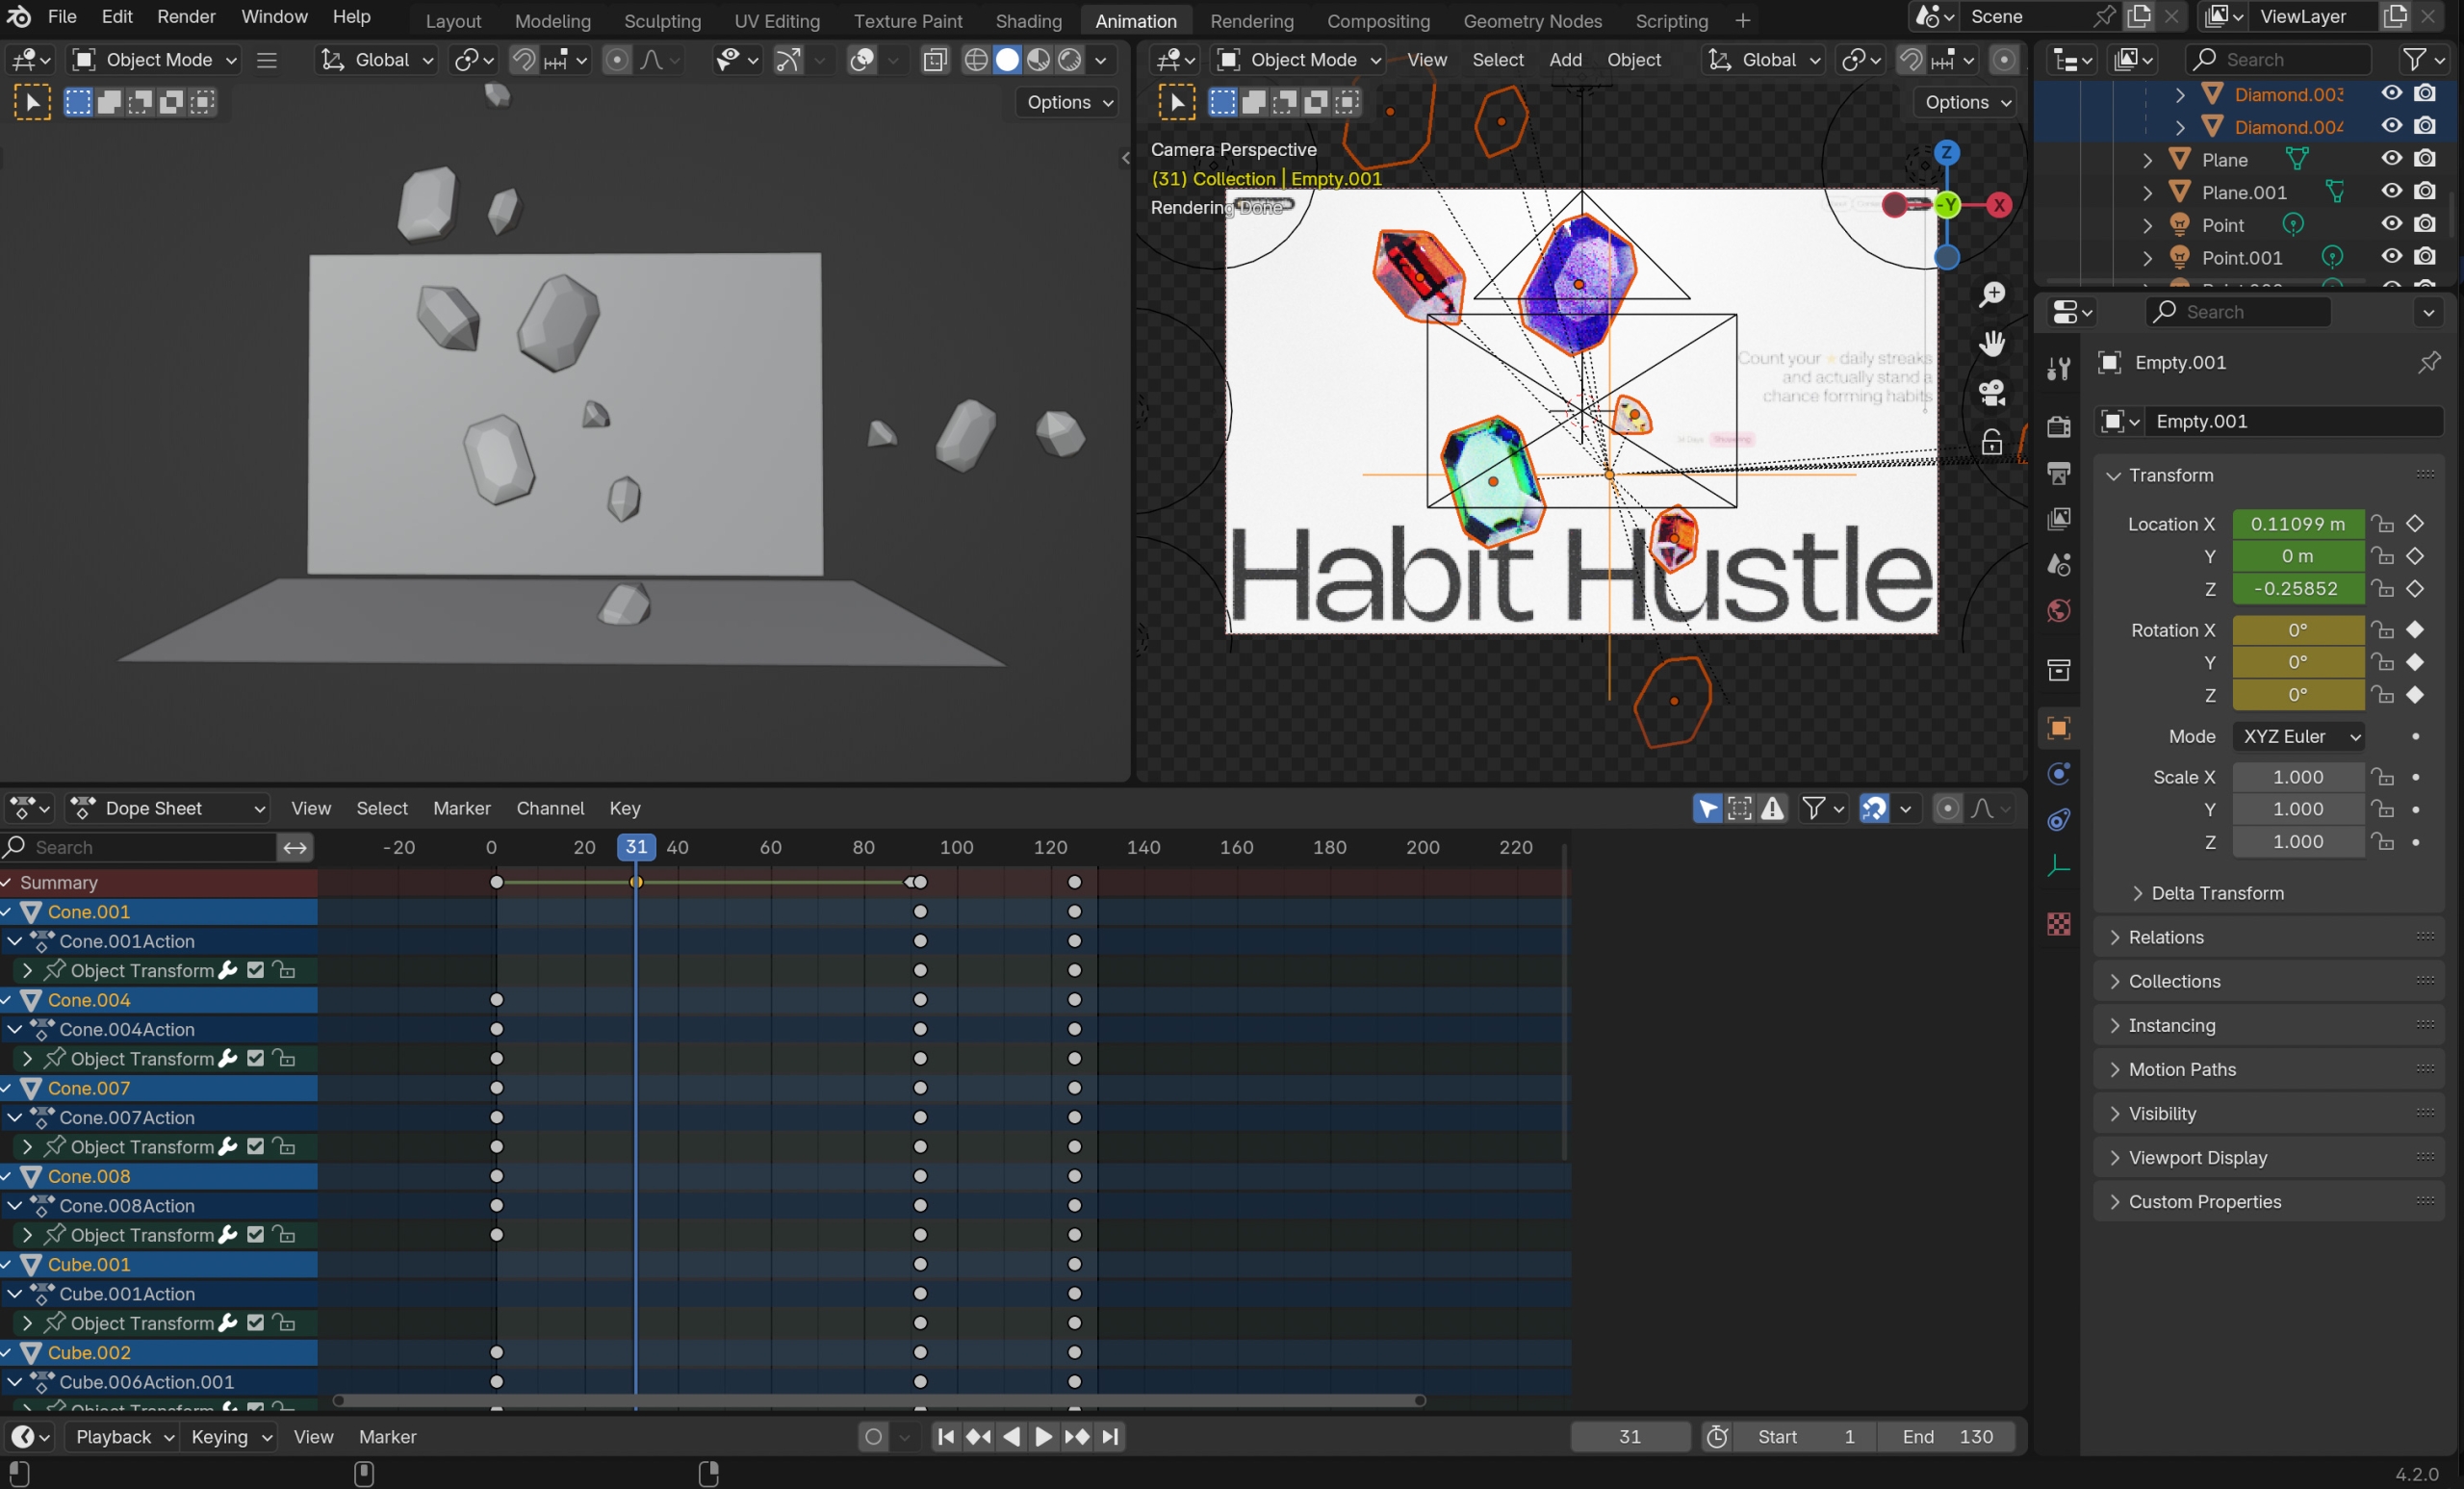
- Set the starting frame of the animation – Open up the animation tab and move the cursor on the timeline to where the movement should begin
- Select which object to animate in the scene – This is where things get a bit tricky. To see what has been animated, the element needs to be selected to reveal it in the timeline.
- Set a keyframe for the object’s starting value – Almost anything can be animated which allows for so many possibilities. Hover over the property you want to animate (i.e. position in the Object properties panel) and press I or the white dot next to the property. The first keyframe should be placed on the timelineand the property you selected will change to yellow. In the screenshot below, you can see the yellow animated properties on the right. Green properties means the property is anmiated, but there isn’t a keyframe on the current frame in the timeline.
- Move the timeline cursor to the ending frame of the animation
- Adjust the animated property – You can do this manually if it’s a value like part of shader node tree or the just move or rotate your object.
- Set a new keyframe for the new object property – Hover the property that was animated and either hit I or click the diamond keyframe icon next to the animated property. It’s really important to remember to set the new keyframe, otherwise Blender won’t save it when you hit play on the animation or move to a new frame in the timeline. One of the more frustrating parts is moving around a few objects and forgetting to set a new keyframe then losing all that work.
- Play the animation – If you’re watching the animation in Cycles, I’d suggest saving your work for sure before previewing the animation. Blender can crash unexpectedly here if it’s trying to play an animation while rendering. To play or pause the animation, just hit space bar.
Save often! Blender crashes quite a bit and always unexpectedly. It generally crashes when I’m previewing an animation or if I’m caching something with physics.
5. Render a Test from Blender into AfterEffects
Before making the final render, I’ll do a quick render with the Workbench render engine in Blender to test the animations in AfterEffects to further sync up the timings. This can be tedious to match the easing curves and it helps to try to do any big, scroll movements in AfterEffects. I normally do step 3 and step 4 multiple times to tweak the two animations to get them just right.
The hardest part is the render time with glass animations. I avoided doing any distorted text behind the gems in this one because you can cheat a bit more in AE and don’t have to get everything perfect.
I also cheated a bit here and broke the gem animations into two parts: the first scroll where the gems scale into a carousel and the click interaction where the gemstone scales up and the rest drop out.
6. Loop Animation and Finalize Details
After the test render is in the comp, I start working on the final bits of animation. This is where I start adding all the final details since all the pieces are together now and it’s much easier to tweak.
Normally, I try to build the looping part of the animation before I render out the final render from Cycles in Blender to save time. About half the time, I realized I needed to change some timings or the length of the Blender animation to make the loop seamless.
A trick I’ve found to make looping the animation easier to get exact is to build the loop in a parent composition, add the page wipes there, and then duplicate your page animation layer and restart it at the same point as your animation starts.
The loop is unnecessary for dev prototypes and client projects, but it sure does look nice for social media and case studies. ✨
7. Render the Final Animation in Blender with Cycles
Keeping my fingers crossed that the final render will turn out, I start the final render from Blender which can take hours, especially with glass materials. If I get lucky, the first render will be close enough and I can do some AfterEffects tricks to clean it up and if I’m not so lucky, I’ll need to render again.
Final Result
And then all done! Sometimes it can take a few renders or repeating a few of the steps.
These prototypes are always fun to do because it’s rare that I get to make as polished an animation in client projects and they are a chance to practice new skills. Sometimes they pay off when a client likes a specific animation and I’m able to reuse the same idea later on. The best advice I’ve found for these side project posts is to have fun with them and keep them enjoyable. Learning new skills is a big time commitment and I always try to stick with things that I find interesting and ditch the things I find boring.
Thanks for scrolling!
– Michael