
Large Language Models (LLMs) are popular right now, and it is fun to test out new projects and models. But sharing your project with others can be a challenge – most cloud platforms are either pricey, hard to configure, or both.
That is where Hugging Face Spaces makes a difference. Hugging Face isn’t just for models and datasets; it also offers an ML infrastructure like other popular cloud providers. The best part? They provide free CPU instances that are perfect for lightweight LLM applications. This means you can move your project off your local machine and share it with the world, without spending a cent. HuggingFace Spaces let you deploy your machine learning apps, whether built with Streamlit, Gradio, or Docker, in just a few clicks, completely free and with minimal setup.
In this hands-on tutorial, I’ll walk you through how to deploy a simple chatbot built with Streamlit to Hugging Face Spaces – from scratch to live.
Deploying an LLM to HuggingFace Spaces
As a per-requisite, you will need a HuggingFace account. If you don’t have one already, create a new account using the login page. Once that is done, you’re ready to start — no extra setup or cloud services needed.
1. Creating a New Space
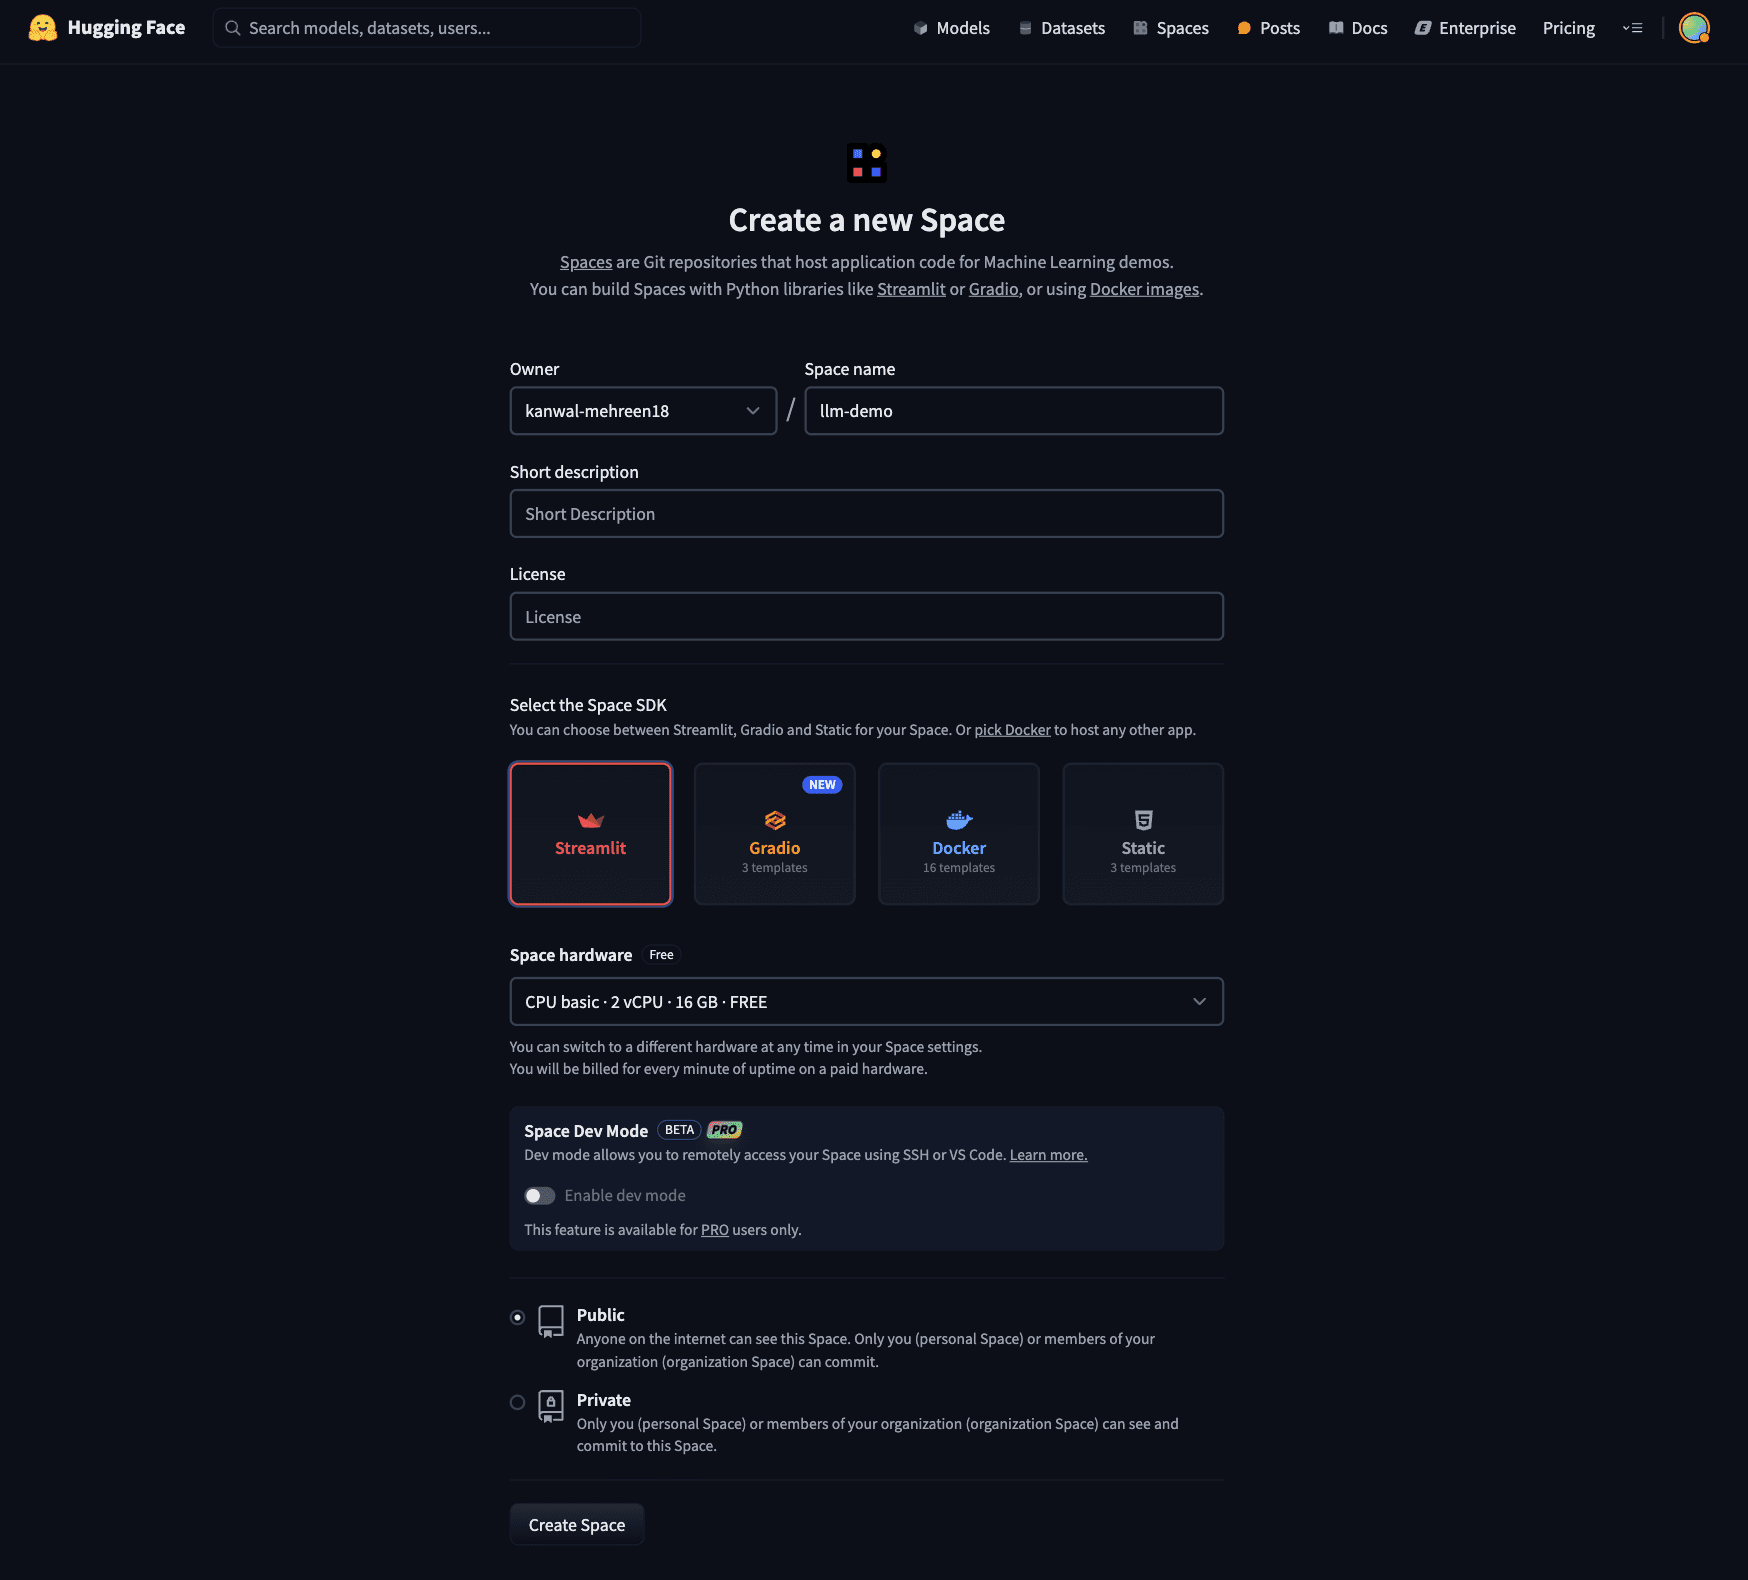
To create a new space, head over to the create new space page in HuggingFace. The page should contain the below details:
- Space Name: This will be reflected in the final URL and name of your project.
- SDK: Select Streamlit as the backend. Other options include Gradio, Docker and static HTML.
- Space Hardware: It is set to free CPU instances by default, but HuggingFace also offers paid options for higher resources and GPU instances. For now, we will use the basic CPU instance.
- Visibility: Set the visibility of the project. It is set to public, so anyone can access your space and see your project. Private instances are only visible to you and people in your organization (if any).
After filling in the details, it should look similar to the below page:
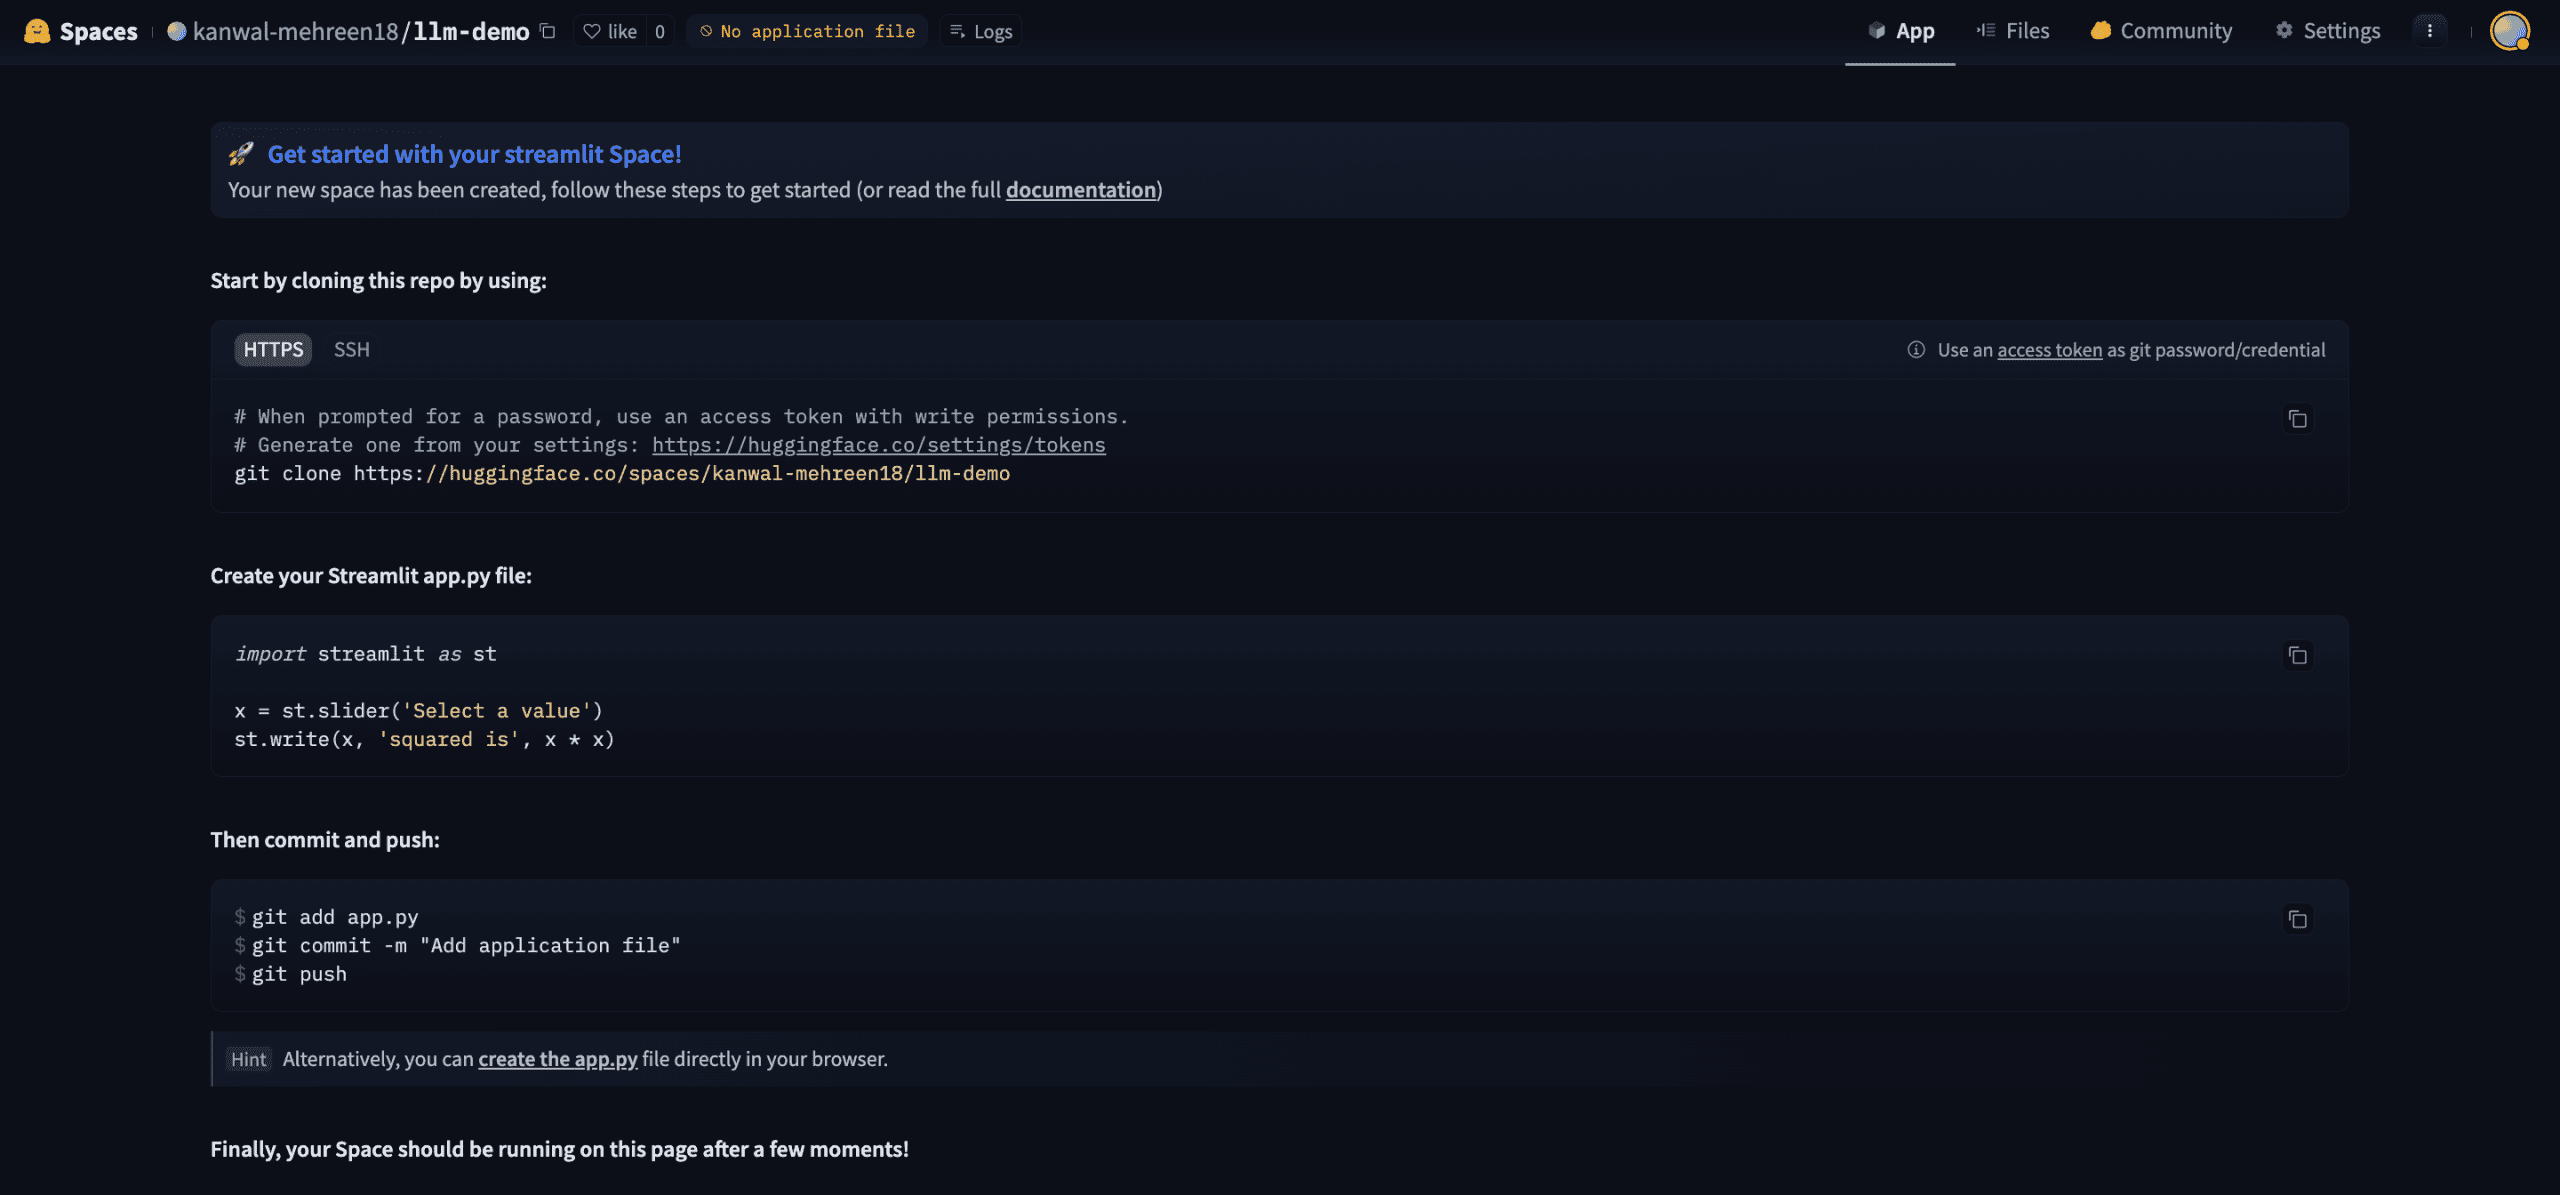
Once everything is filled out, hit “Create Space”. You’ll be redirected to your new Space page, which includes setup instructions and an empty repository to get started with your code.
At this point, your new Space should look something like this:
2. Cloning the New Space
Hugging Face Spaces work similarly to GitHub repositories; you can clone the Space, make changes locally, and then push updates back. Once your project includes the necessary files, Hugging Face will automatically detect the changes, build the app, and deploy it.
Let’s start by cloning the Space to your local machine.
You’ll find the Git clone command on your Space’s page. The command follows this format:
git clone https://huggingface.co/spaces/your-username/your-space-name
Run the command in your terminal. This will clone a Git repository that’s already connected to your Hugging Face Space. Note that this won’t be an empty repo—it includes pre-filled configuration files that help Hugging Face set up and deploy your app.
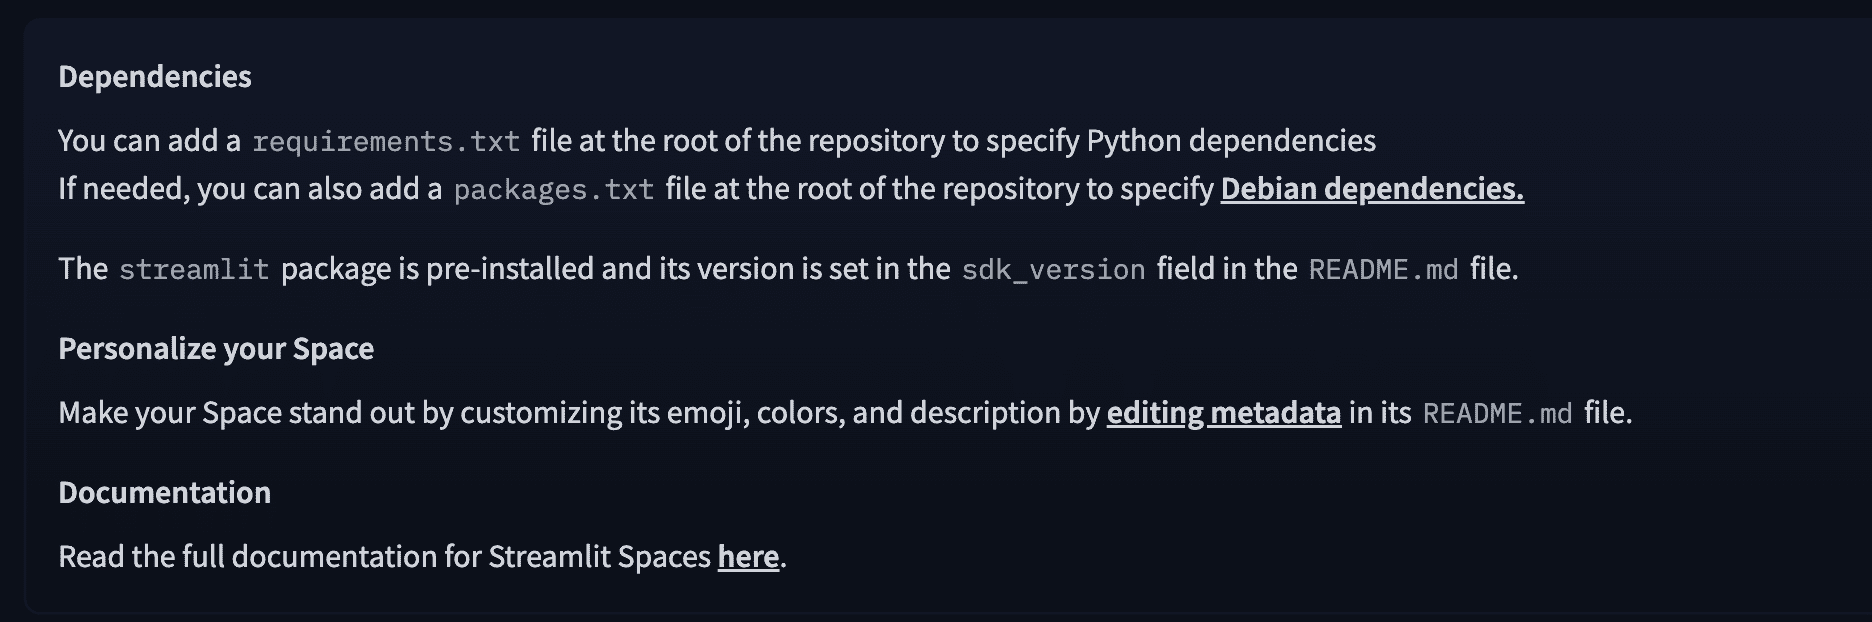
Inside the cloned repo, you’ll find a file named README.md which includes metadata for your application. This YAML block tells Hugging Face how to build your app:
- sdk: Set to streamlit
- sdk_version: Specifies the Streamlit version to use
- app_file: The entry point of your app (typically app.py) which will be executed to start your space
You Readme.md file should follow a similar outline:
---
title: Llm Demo
emoji: 👀
colorFrom: pink
colorTo: blue
sdk: streamlit
sdk_version: 1.44.1
app_file: app.py
pinned: false
---
Check out the configuration reference at https://huggingface.co/docs/hub/spaces-config-reference.
3. Coding Your LLM Application with Streamlit
Now that your Space is set up and cloned locally, it’s time to build your application!
First, let’s create a requirements.txt file. As highlighted in the image below, this file tells HuggingFace which Python libraries your app needs, and it will automatically install them during the build process:
For this project, you will need the transformers and PyTorch library to run your LLM application. Your requirements.txt file should look similar to below:
transformers
torch
streamlit
Fow now, use Google’s FLAN-T5-small, a lightweight language model that takes ~300MB RAM. Since you are using a CPU instance, more complex models may result in slow performance or fail to load due to memory constraints. We’ll build a simple Streamlit interface that wraps around this model to act as a basic chatbot.
Create a new file named app.py and paste the following code inside:
import streamlit as st
from transformers import AutoTokenizer, AutoModelForSeq2SeqLM, pipeline

@st.cache_resource
def load_model():
	tokenizer = AutoTokenizer.from_pretrained("google/flan-t5-small")
	model = AutoModelForSeq2SeqLM.from_pretrained("google/flan-t5-small")
	return pipeline("text2text-generation", model=model, tokenizer=tokenizer)

st.set_page_config(page_title="LLM Demo", layout="centered")
st.title("🚀 FLAN-T5 Small - HuggingFace Demo")

pipe = load_model()

user_input = st.text_area("Enter your instruction or question:", "")

if st.button("Generate Response"):
	if user_input.strip() == "":
    	st.warning("Please enter some text.")
	else:
    	with st.spinner("Generating..."):
        	output = pipe(user_input, max_new_tokens=100)[0]["generated_text"]
        	st.success("### Response:")
        	st.write(output)
The code uses the transformers library to load the FLAN-T5-small model as a text-to-text generation pipeline, which allows the LLM to generate responses based on user input. It then sets up a clean and interactive UI using Streamlit, featuring a simple text input field where users can type their prompts. Once a user submits a question, the app generates a response using the LLM and displays it in a chatbot-like format. To optimize performance, the model loading is cached using @st.cache_resource, ensuring that the model isn’t reloaded on every interaction, which helps speed things up and reduce resource usage.
To test the app locally, run the below commands to run our streamlit application:
pip install -r requirements.txt
streamlit run app.py
4. Pushing Recent Changes to Spaces
Once your app is ready, getting it to production is as easy as pushing your code to your Hugging Face Spaces repo. Let’s go through the steps together.
Start by committing your code changes to the local Git repository:
git add .
git commit -m "Initial commit with Streamlit LLM app"
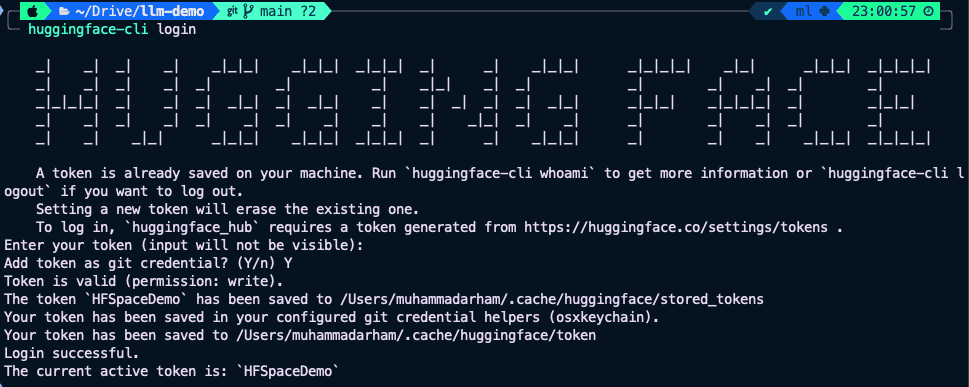
To push to the remote repository, you need to authenticate with Hugging Face using an Access Token that has write access. Head over to the access token settings page for your HuggingFace account. Create a new token with write access and save it locally as you will not be able to see it again.
Now, authenticate your terminal using the Hugging Face CLI:
pip install huggingface-hub
huggingface-cli login
You’ll be prompted to paste your access token and confirm setup. For most users, this process should complete successfully and your terminal will confirm the login.
Once authenticated, push your changes using:
However, if you are using macOS, you might encounter a known issue where Git fails to push due to credential conflicts:
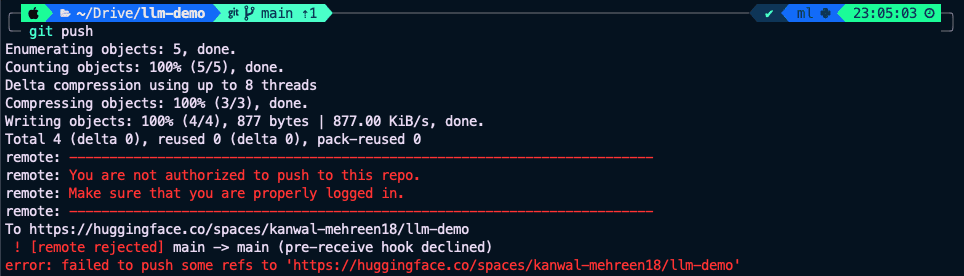
If that happens, use the following workaround:
git push -u https://HF_USERNAME:HF_ACCESS_TOKEN@huggingface.co/spaces/HF_USERNAME/HF_SPACE_NAME
Replace
5. Testing your Deployed Space
Once Hugging Face Spaces detects the new changes in your repository, it automatically kicks off the build and deployment process. You’ll see live build logs as it installs your dependencies and starts your Streamlit app.
If everything goes smoothly, your application will be live and ready to use — no manual setup needed! When the app is up and running, it should look something like this:
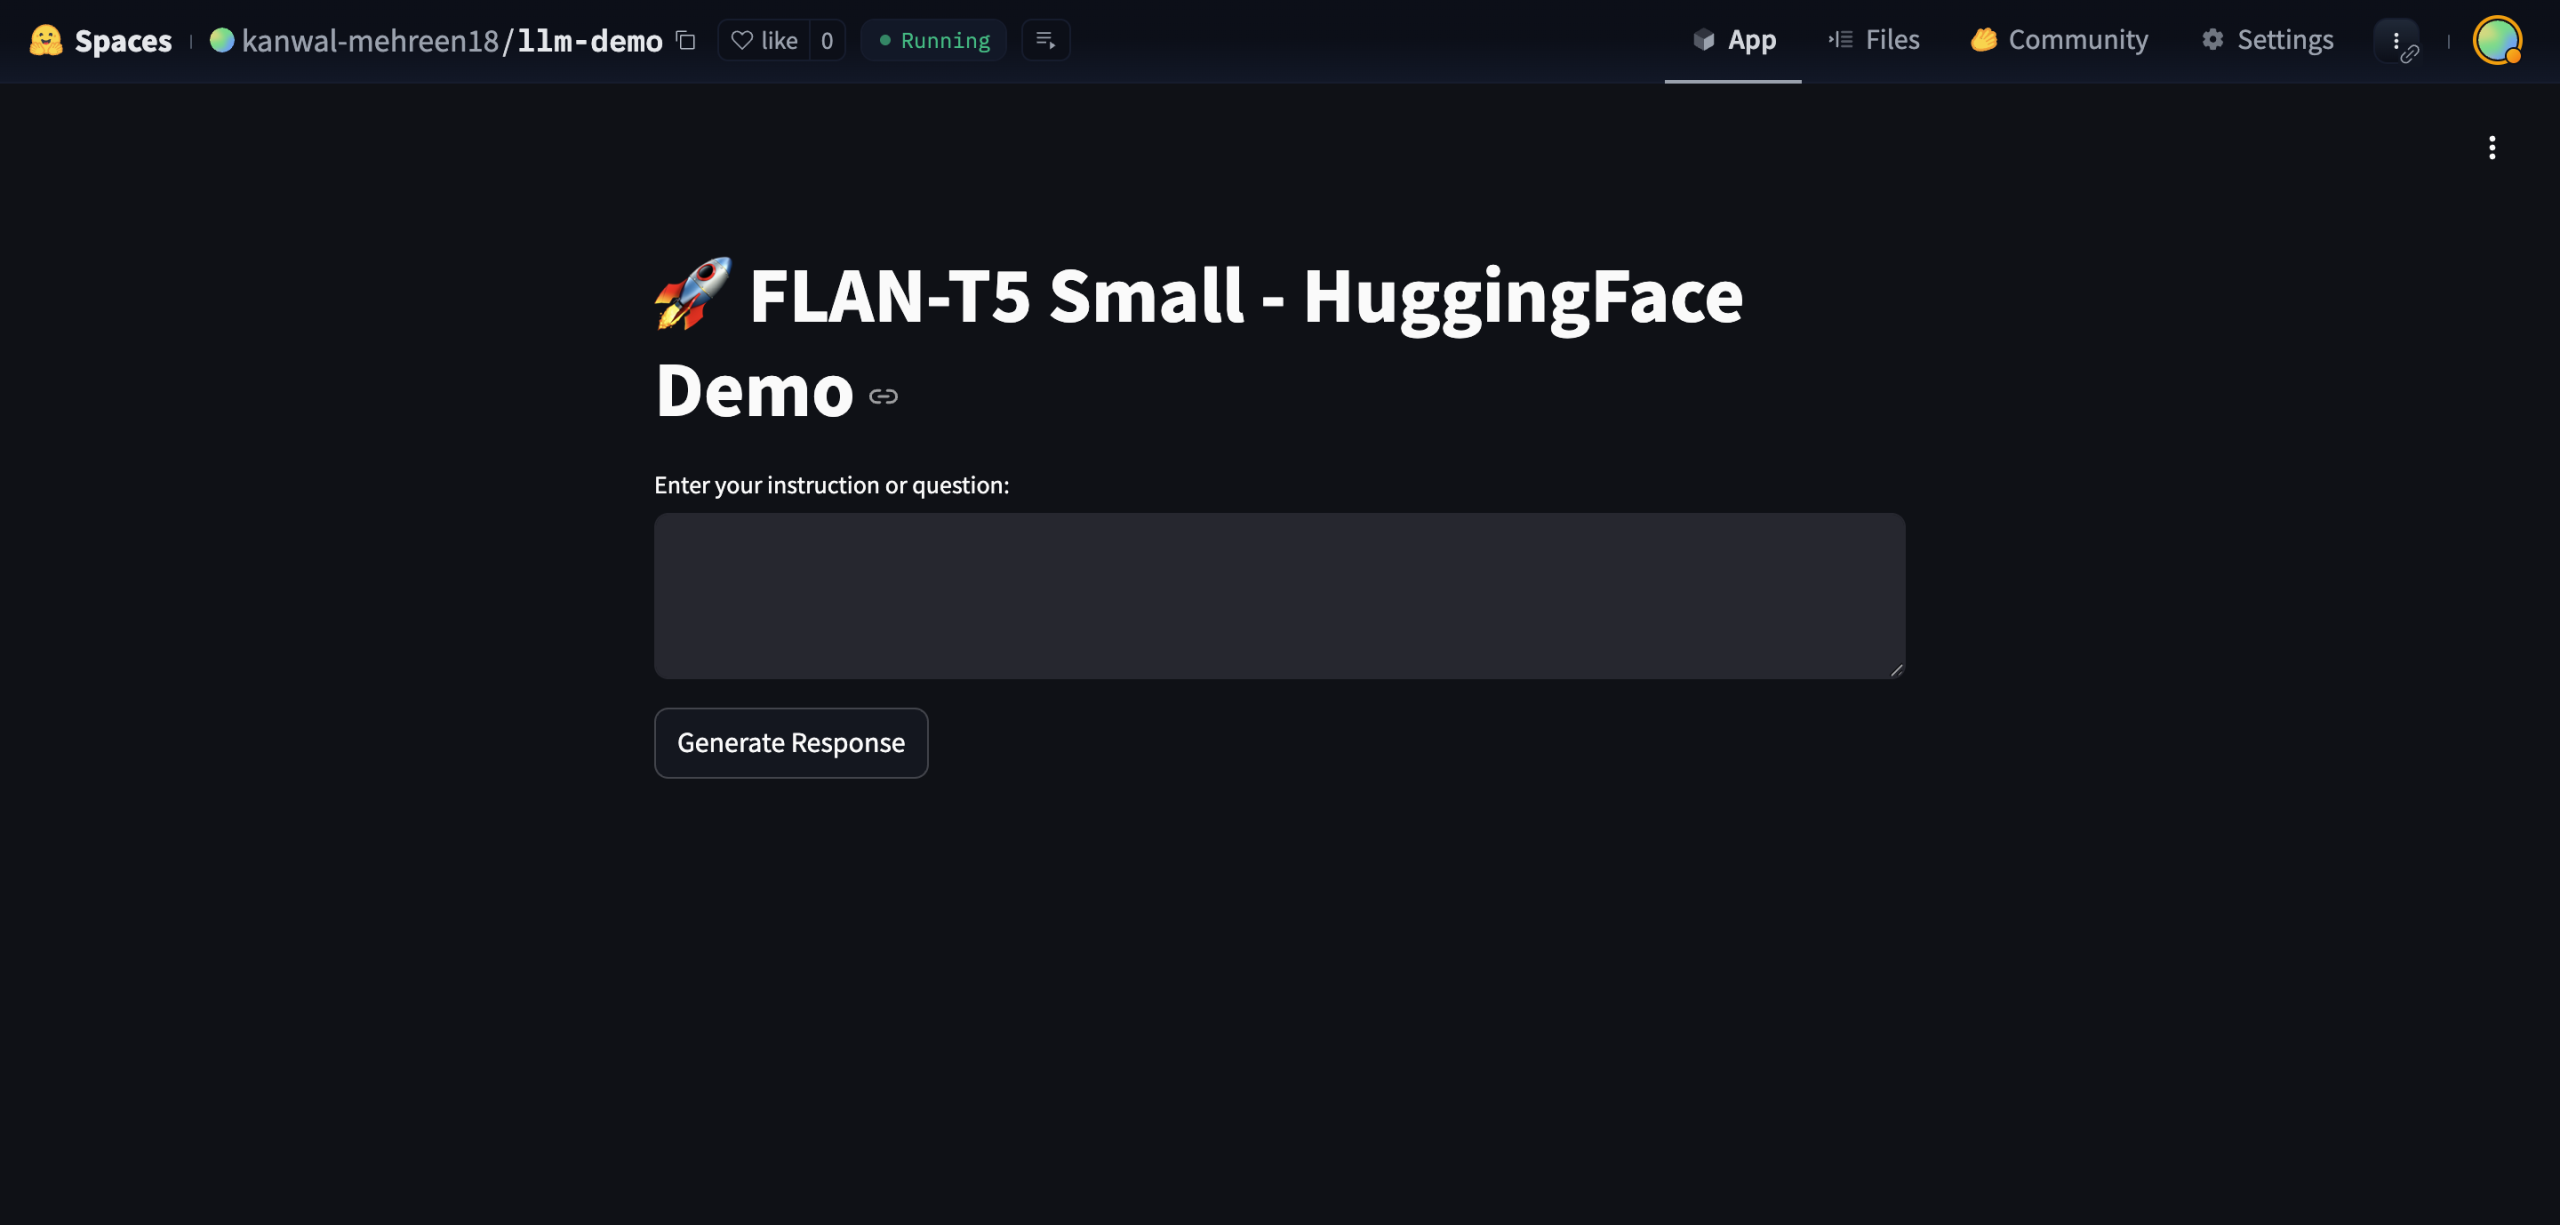
You can now interact with your chatbot directly in the browser and get a public URL to share with anyone. It’s a super simple and cost-effective way to demo your LLM project to the world! Just keep in mind that we used the Flan-T5-small model for this demo – it’s lightweight and CPU-friendly, but not the most accurate for complex queries. You can easily swap it out for a more powerful model depending on your needs.
Wrapping Up
In this tutorial, we deployed a lightweight LLM chatbot using Streamlit on Hugging Face Spaces — from creating a new space and coding the app to pushing it live with zero cost. With just a few steps, we turned a local prototype into a shareable web app powered by Flan-T5-small. From here, you can start enhancing the UI with chat history or markdown, switch to more powerful or fine-tuned models, or even explore alternative backends like Gradio or Docker. For more advanced apps, you can add features like file uploads, voice input, or move to GPU-backed Spaces for heavier workloads.
Hugging Face Spaces makes it incredibly simple to bring your LLM projects online, so keep building, experimenting, and sharing your work with the world.
Kanwal Mehreen Kanwal is a machine learning engineer and a technical writer with a profound passion for data science and the intersection of AI with medicine. She co-authored the ebook “Maximizing Productivity with ChatGPT”. As a Google Generation Scholar 2022 for APAC, she champions diversity and academic excellence. She’s also recognized as a Teradata Diversity in Tech Scholar, Mitacs Globalink Research Scholar, and Harvard WeCode Scholar. Kanwal is an ardent advocate for change, having founded FEMCodes to empower women in STEM fields.