
While experimenting with particle systems, I challenged myself to create particles with tails, similar to snakes moving through space. At first, I didn’t have access to TSL, so I tested basic ideas, like using noise derivatives and calculating previous steps for each particle, but none of them worked as expected.
I spent a long time pondering how to make it work, but all my solutions involved heavy testing with WebGL and GPGPU, which seemed like it would require too much code for a simple proof of concept. That’s when TSL (Three.js Shader Language) came into play. With its Compute Shaders, I was able to compute arrays and feed the results into materials, making it easier to test ideas quickly and efficiently. This allowed me to accomplish the task without much time lost.
Now, let’s dive into the step-by-step process of building the particle system, from setting up the environment to creating the trails and achieving that fluid movement.
Step 1: Set Up the Particle System
First, we’ll define the necessary uniforms that will be used to create and control the particles in the system.
uniforms = {
    color: uniform( new THREE.Color( 0xffffff ).setRGB( 1, 1, 1 ) ),
    size: uniform( 0.489 ),

    uFlowFieldInfluence: uniform( 0.5 ),
    uFlowFieldStrength: uniform( 3.043 ),
    uFlowFieldFrequency: uniform( 0.207 ),
}
Next, create the variables that will define the parameters of the particle system. The “tails_count” variable determines how many segments each snake will have, while the “particles_count” defines the total number of segments in the scene. The “story_count” variable represents the number of frames used to store the position data for each segment. Increasing this value will increase the distance between segments, as we will store the position history of each one. The “story_snake” variable holds the history of one snake, while “full_story_length” stores the history for all snakes. These variables will be enough to bring the concept to life.
tails_count = 7 //  n-1 point tails
particles_count = this.tails_count * 200 // need % tails_count
story_count = 5 // story for 1 position
story_snake = this.tails_count * this.story_count
full_story_length = ( this.particles_count / this.tails_count ) * this.story_snake
Next, we need to create the buffers required for the computational shaders. The most important buffer to focus on is the “positionStoryBuffer,” which will store the position history of all segments. To understand how it works, imagine a train: the head of the train sets the direction, and the cars follow in the same path. By saving the position history of the head, we can use that data to determine the position of each car by referencing its position in the history.
const positionsArray = new Float32Array( this.particles_count * 3 )
const lifeArray = new Float32Array( this.particles_count )

const positionInitBuffer = instancedArray( positionsArray, 'vec3' );
const positionBuffer = instancedArray( positionsArray, 'vec3' );

// Tails
const positionStoryBuffer = instancedArray( new Float32Array( this.particles_count * this.tails_count * this.story_count ), 'vec3' );

const lifeBuffer = instancedArray( lifeArray, 'float' );
Now, let’s create the particle system with a material. I chose a standard material because it allows us to use an emissiveNode, which will interact with Bloom effects. For each segment, we’ll use a sphere and disable frustum culling to ensure the particles don’t accidentally disappear off the screen.
const particlesMaterial = new THREE.MeshStandardNodeMaterial( {
metalness: 1.0,
roughness: 0
} );
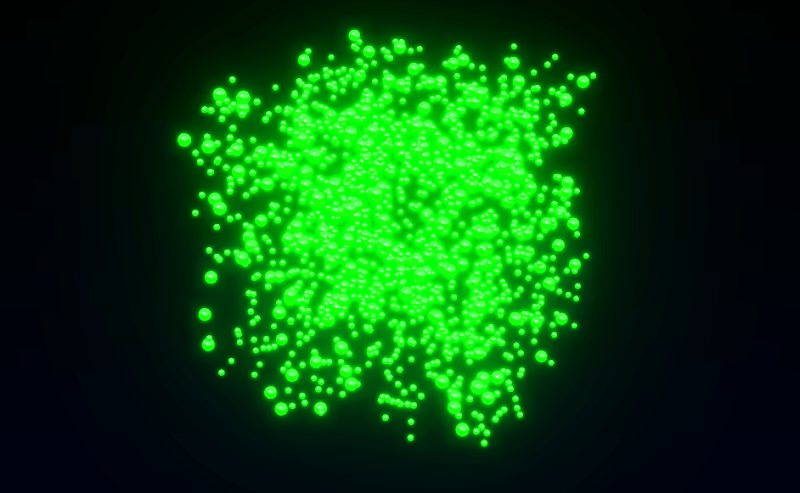
particlesMaterial.emissiveNode = color(0x00ff00)
const sphereGeometry = new THREE.SphereGeometry( 0.1, 32, 32 );
const particlesMesh = this.particlesMesh = new THREE.InstancedMesh( sphereGeometry, particlesMaterial, this.particles_count );
particlesMesh.instanceMatrix.setUsage( THREE.DynamicDrawUsage );
particlesMesh.frustumCulled = false;
this.scene.add( this.particlesMesh )
Step 2: Initialize Particle Positions
To initialize the positions of the particles, we’ll use a computational shader to reduce CPU usage and speed up page loading. We randomly generate the particle positions, which form a pseudo-cube shape. To keep the particles always visible on screen, we assign them a lifetime after which they disappear and won’t reappear from their starting positions. The “cycleStep” helps us assign each snake its own random positions, ensuring the tails are generated in the same location as the head. Finally, we send this data to the computation process.
const computeInit = this.computeInit = Fn( () => {
    const position = positionBuffer.element( instanceIndex )
    const positionInit = positionInitBuffer.element( instanceIndex );
    const life = lifeBuffer.element( instanceIndex )

    // Position
    position.xyz = vec3(
        hash( instanceIndex.add( uint( Math.random() * 0xffffff ) ) ),
        hash( instanceIndex.add( uint( Math.random() * 0xffffff ) ) ),
        hash( instanceIndex.add( uint( Math.random() * 0xffffff ) ) )
    ).sub( 0.5 ).mul( vec3( 5, 5, 5 ) );

    // Copy Init
    positionInit.assign( position )

    const cycleStep = uint( float( instanceIndex ).div( this.tails_count ).floor() )

    // Life
    const lifeRandom = hash( cycleStep.add( uint( Math.random() * 0xffffff ) ) )
    life.assign( lifeRandom )

} )().compute( this.particles_count );

this.renderer.computeAsync( this.computeInit ).then( () => {
    this.initialCompute = true
} )
Step 3: Compute Position History
For each frame, we compute the position history for each segment. The key aspect of the “computePositionStory” function is that new positions are recorded only from the head of the snake, and all positions are shifted one step forward using a queue algorithm.
const computePositionStory = this.computePositionStory = Fn( () => {
    const positionStory = positionStoryBuffer.element( instanceIndex )

    const cycleStep = instanceIndex.mod( uint( this.story_snake ) )
    const lastPosition = positionBuffer.element( uint( float( instanceIndex.div( this.story_snake ) ).floor().mul( this.tails_count ) ) )

    If( cycleStep.equal( 0 ), () => { // Head
        positionStory.assign( lastPosition )
    } )

    positionStoryBuffer.element( instanceIndex.add( 1 ) ).assign( positionStoryBuffer.element( instanceIndex ) )

} )().compute( this.full_story_length );
Step 4: Update Particle Positions
Next, we update the positions of all particles, taking into account the recorded history of their positions. First, we use simplex noise to generate the new positions of the particles, allowing our snakes to move smoothly through space. Each particle also has its own lifetime, during which it moves and eventually resets to its original position. The key part of this function is determining which particle is the head and which is the tail. For the head, we generate a new position based on simplex noise, while for the tail, we use positions from the saved history.
const computeUpdate = this.computeUpdate = Fn( () => {

    const position = positionBuffer.element( instanceIndex )
    const positionInit = positionInitBuffer.element( instanceIndex )

    const life = lifeBuffer.element( instanceIndex );

    const _time = time.mul( 0.2 )

    const uFlowFieldInfluence = this.uniforms.uFlowFieldInfluence
    const uFlowFieldStrength = this.uniforms.uFlowFieldStrength
    const uFlowFieldFrequency = this.uniforms.uFlowFieldFrequency

    If( life.greaterThanEqual( 1 ), () => {
        life.assign( life.mod( 1 ) )
        position.assign( positionInit )

    } ).Else( () => {
        life.addAssign( deltaTime.mul( 0.2 ) )
    } )

    // Strength
    const strength = simplexNoise4d( vec4( position.mul( 0.2 ), _time.add( 1 ) ) ).toVar()
    const influence = uFlowFieldInfluence.sub( 0.5 ).mul( -2.0 ).toVar()
    strength.assign( smoothstep( influence, 1.0, strength ) )

    // Flow field
    const flowField = vec3(
        simplexNoise4d( vec4( position.mul( uFlowFieldFrequency ).add( 0 ), _time ) ),
        simplexNoise4d( vec4( position.mul( uFlowFieldFrequency ).add( 1.0 ), _time ) ),
        simplexNoise4d( vec4( position.mul( uFlowFieldFrequency ).add( 2.0 ), _time ) )
    ).normalize()

    const cycleStep = instanceIndex.mod( uint( this.tails_count ) )

    If( cycleStep.equal( 0 ), () => { // Head
        const newPos = position.add( flowField.mul( deltaTime ).mul( uFlowFieldStrength ) /* * strength */ )
        position.assign( newPos )
    } ).Else( () => { // Tail
        const prevTail = positionStoryBuffer.element( instanceIndex.mul( this.story_count ) )
        position.assign( prevTail )
    } )

} )().compute( this.particles_count );
To display the particle positions, we’ll create a simple function called “positionNode.” This function will not only output the positions but also apply a slight magnification effect to the head of the snake.
particlesMaterial.positionNode = Fn( () => {
    const position = positionBuffer.element( instanceIndex );

    const cycleStep = instanceIndex.mod( uint( this.tails_count ) )
    const finalSize = this.uniforms.size.toVar()

    If( cycleStep.equal( 0 ), () => {
        finalSize.addAssign( 0.5 )
    } )

    return positionLocal.mul( finalSize ).add( position )
} )()
The final element will be to update the calculations on each frame.
async update( deltaTime ) {

    // Compute update
    if( this.initialCompute) {
        await this.renderer.computeAsync( this.computePositionStory )
        await this.renderer.computeAsync( this.computeUpdate )
    }
}Conclusion
Now, you should be able to easily create position history buffers for other problem-solving tasks, and with TSL, this process becomes quick and efficient. I believe this project has potential for further development, such as transferring position data to model bones. This could enable the creation of beautiful, flying dragons or similar effects in 3D space. For this, a custom bone structure tailored to the project would be needed.