
Image by Author | Canva
A few years ago, the only voice assistants we knew about were Alexa, Siri, and Google Assistant. It felt like only big companies with lots of experience could make such smart tools. But now, anyone can create their own real-time AI voice agent using TEN Agent. It’s a conversational AI framework powered by the TEN, integrating Gemini 2.0 Live, OpenAI Realtime, RTC, and more. It delivers real-time capabilities to see, hear, and speak, while being fully compatible with popular workflow platforms like Dify and Coze. Key features include:
- Real-time capabilities: Ultra-low latency voice and video interactions with support for interruptions and natural dialogue.
- Multimodal support: Handles voice, video, images, and text seamlessly.
- Cross-platform compatibility: Runs on Windows, Mac, Linux, and even mobile devices or hardware like the ESP32.
- Extensive integrations: Works with APIs like OpenAI, Deepgram, ElevenLabs, and Google Gemini, plus tools like weather checks and web search.
- Ease of use: Offers a drag-and-drop playground interface and Docker containers for quick setup.
In this guide, we’ll walk you through the easiest way to create your own real-time AI voice agent using TEN Agent. From setting up the environment to customizing and deploying your agent, this article covers everything you need to get started.
Getting Started: Building the TEN Agent Playground
Prerequisites
Before you begin, ensure you have:
API Keys:
- Agora App ID and Certificate: For real-time communication (free minutes available monthly).
- OpenAI API Key: Compatible with any OpenAI-supported LLM.
- Deepgram ASR: For speech-to-text (free credits with signup).
- ElevenLabs TTS: For text-to-speech (free credits with signup).
You can also use Fish Audio and Cartesia for TTS, as well as other supported models for STT.
Installations:
- Docker and Docker Compose.
- Node.js (LTS v18 recommended).
Minimum System Requirements:
- CPU: 2 cores or more.
- RAM: 4 GB or more.
Docker Settings for Apple Silicon
If you’re using an Apple Silicon Mac, open Docker Desktop settings and uncheck “Use Rosetta for x86/amd64 emulation.” This may slow build times on ARM, but performance will normalize when deployed to x64 servers.
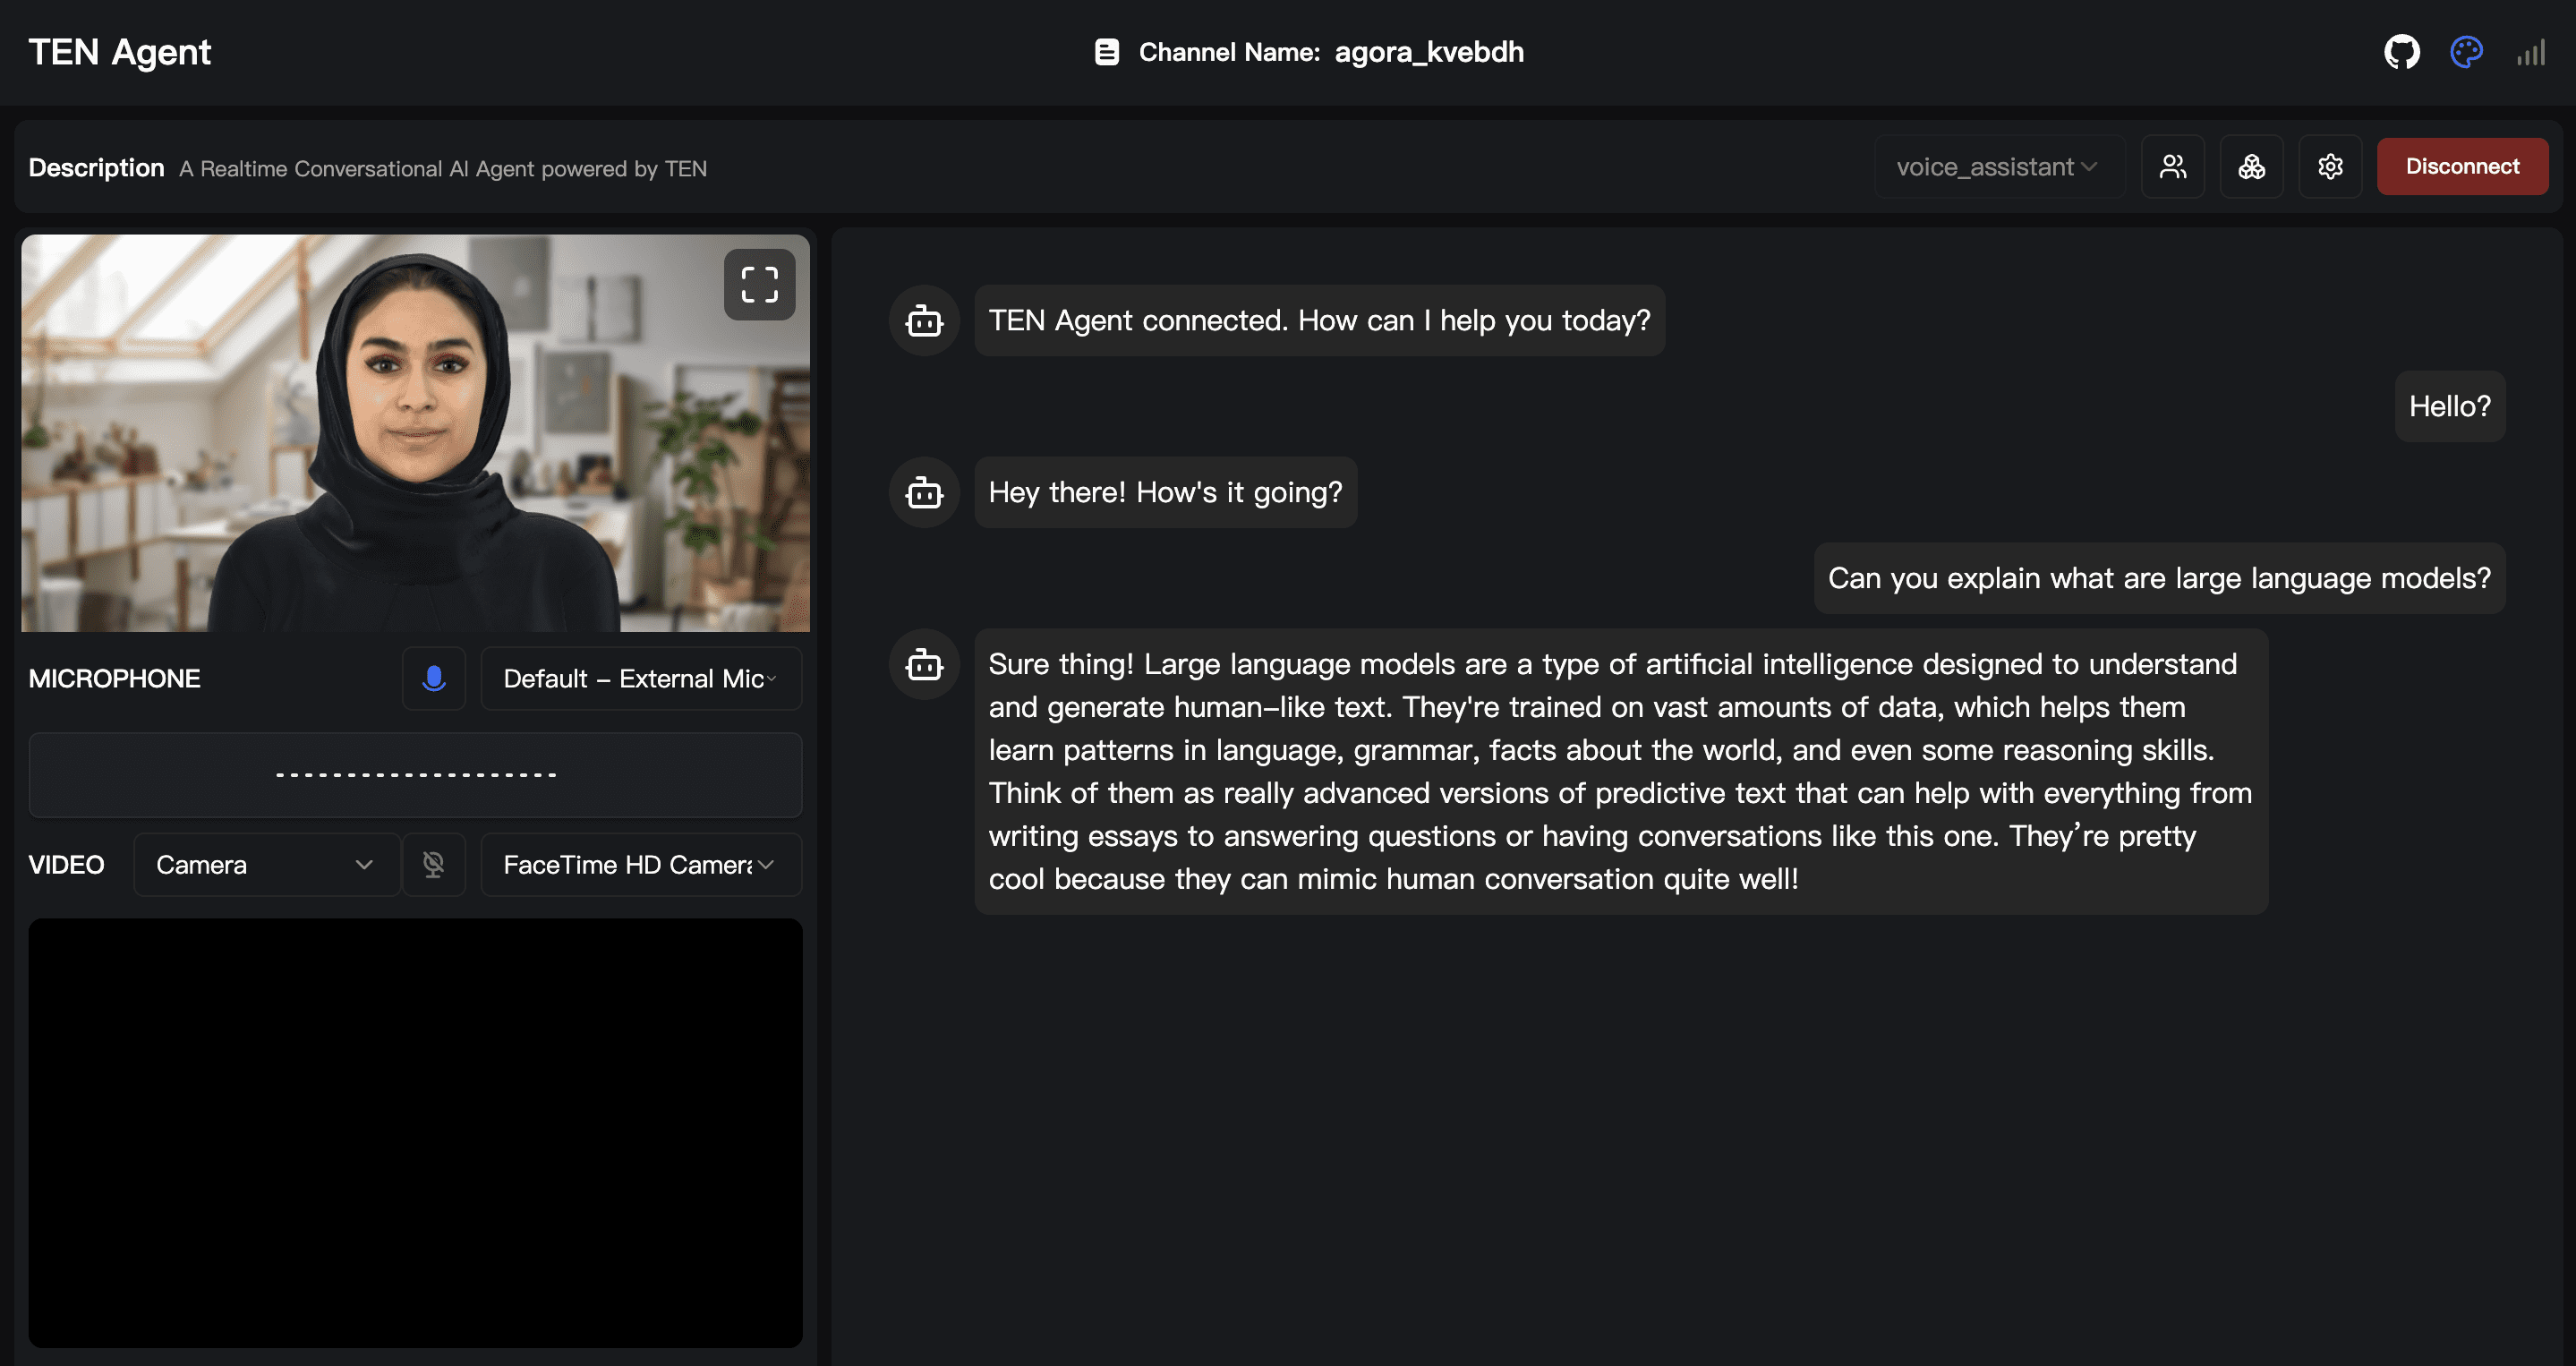
Optional: If you’re using Trulience AI Avatars, you’ll need an avatar ID and token. To find your token, click Edit → Code → Token in the iFrame code displayed at the top. For example, I have selected the avatar Nadia for my experiment.
Step-by-Step Setup to Create Voice Agent
- Clone the Repository: Open your terminal and clone the TEN Agent repository:
- Prepare Config Files: Create an .env file from the example provided:
- Set Up Agora Credentials: Open the newly created .env file and fill in:
- Start Docker Containers: From the root directory, start your Docker containers in detached mode:
- Enter the Container: Access the development container’s shell:
- Build the agent: Once inside the container, build the agent:
- Start the Web Server: Launch the web server using this command:
- Configure the Playground: Open your browser and navigate to localhost:3000. In the playground:
git clone https://github.com/TEN-framework/TEN-Agent.git
Navigate into the project directory:
AGORA_APP_ID=
AGORA_APP_CERTIFICATE=
Output:
[+] Running 3/3
 ✔ Container ten_agent_demo        Running          0.0s
 ✔ Container ten_agent_playground  Running          0.0s
 ✔ Container ten_agent_dev         Started          15.4s
docker exec -it ten_agent_dev bash
Output:
root@b41516e8c5cd:/app#
This will install all the dependencies and the required packages which might take some time:
task: [use] ln -sf /app/agents/examples/default/manifest.json ./agents/
task: [use] ln -sf /app/agents/examples/default/property.json ./agents/
task: [build-agent] ./scripts/install_deps_and_build.sh linux x64 && mv bin/main bin/worker
install dependencies...
  Get all installed packages...
  Filter compatible packages...
  Attempting to retrieve information about locked packages from manifest-lock.json...
  Collect all candidate packages...
  ....
- Select a graph type (e.g., Voice Agent, Realtime Agent etc).
- Choose a corresponding module (e.g., STT, TTS, LLM, V2V).
- Select an extension and input its API key settings.
- Attach extra tools (e.g., weather check, web searches) to your agent if needed.
- Configure module properties like language, voice, or advanced parameters using Properties. For example, for the speech to text extension you can set the language property (e.g. en-US, es-ES, etc.)
Congratulations! Your playground is now running, and you’re ready to customize your agent. You can either use the drag and drop interface of Playground or directly edit your agent configuration in agents/property.json. Afterward, simply refresh the Playground to see your changes in real time.
Running the Demo
TEN Agent also comes with a Demo container for a more production-ready snapshot. To launch it:
- Inside your container (or on your host machine if you prefer), switch the graph folder:
- Then start the agent:
- Open your browser at http://localhost:3002.
task use AGENT=agents/examples/demo
This environment shows how an agent might function in a more locked-down, deployment scenario—perfect for quickly testing real use cases.
Deployment
Once you’ve customized your agent in the Playground, the next step is to package your service:
- Build a release Docker image: From your project root folder, run:
- Run the Docker container
- Test your service
docker build -t ten-agent-server .
For Apple Silicon (ARM):
docker build -t ten-agent-server . --platform linux/amd64
If you’re using the Demo or Experimental agent, you can specify:
docker build --build-arg USE_AGENT=agents/examples/demo -t ten-agent-server .
docker run -itd -p 8083:8080 --env-file .env --name ten-agent-server ten-agent-server
Your agent now runs on port 8083.
- Access your agent’s endpoints (API reference available in the TEN-Agent GitHub repo).
- If you want to connect the Playground UI to this new agent container, start the Playground with:
cd playground
NEXT_PUBLIC_EDIT_GRAPH_MODE=false AGENT_SERVER_URL=http://localhost:8083 pnpm dev
Replace localhost with your server IP if not running locally.
Deploying the Playground UI
You can also containerize your customized Playground to match the agent:
cd playground
docker build --build-arg EDIT_GRAPH_MODE=false -t ten-agent-playground .
docker run -itd -p 4000:3000 \
  -e AGENT_SERVER_URL=http://host.docker.internal:8083 \
  --name ten-agent-playground \
  ten-agent-playground
Now the Playground is accessible at localhost:4000 (or your server’s IP), communicating with your agent at http://host.docker.internal:8083.
Conclusion
By combining modularity, real-time STT/TTS, LLM integration, and simple Docker-based orchestration, TEN Agent simplifies building voice AI solutions. You can start prototyping in minutes, refine your custom graph of modules in the Playground, and then deploy a voice assistant that listens, thinks, and speaks back in real time. If you’ve found this helpful, be sure to star the TEN-Agent GitHub repo to stay updated on new features and improvements.
Kanwal Mehreen Kanwal is a machine learning engineer and a technical writer with a profound passion for data science and the intersection of AI with medicine. She co-authored the ebook “Maximizing Productivity with ChatGPT”. As a Google Generation Scholar 2022 for APAC, she champions diversity and academic excellence. She’s also recognized as a Teradata Diversity in Tech Scholar, Mitacs Globalink Research Scholar, and Harvard WeCode Scholar. Kanwal is an ardent advocate for change, having founded FEMCodes to empower women in STEM fields.